Adding New Locations to Templates
Setting up the locations to be associated with each of your check-in templates is easy to do and can be completed in a few basic steps. A check-in template allows you to pre-define how you want check-in to be structured so that you can start check-in at any time with a single click. Locations are the physical locations on a campus (like a classroom) that kids & guardians can be checked into. This tutorial will explain how to associate the specific locations you would like with your templates.
Keep in mind, the more detailed you are when you set up your location information the better reporting you’ll have later. This tutorial has suggestions on how to best set up templates and locations.
To set up the new location:
- Click on the System Settings gear icon in the upper right
- Click on System Options in the left sidebar
- Select the Campuses and Locations area
- Choose your campus name
- Click +New Location/Age Group
- Complete and save the new location information
To add the new location to a template:
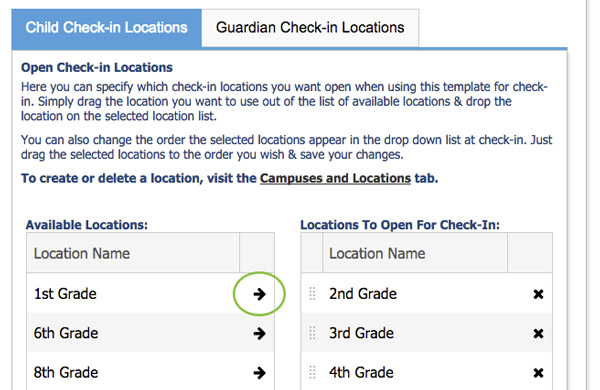
Once you’ve created the new location, you need to associate it with the appropriate template.
- Click on the Check-in tab, and click the grey pencil icon next to the appropriate template
- Click the arrow icon next to the location to move it to the right-hand column (these are the locations that will be used when this template is started)
- Drag and drop the locations in the right-hand column to the desired order
- Click Save Changes