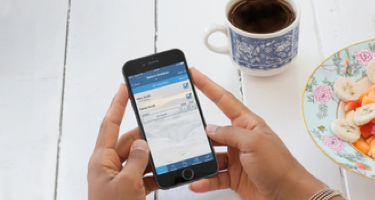
Express Check-In Setup
Express Check-In is the fastest, most efficient way to check-in with KidCheck. Easy and convenient check-in right from a guardian’s smartphone! No more lines! No check-in station needed!

How do we get started with Express Check-In?
- Purchase the necessary hardware. In most cases we recommend the Mobile Printing Bundle. If you already have an extra printer you may only need the ExpressHub
- Enable Express in your KidCheck Settings
We have the hardware and license, what next?
- Set up and configure the ExpressHub to your network
- Be sure to use signage to clearly convey the set up is an “Express Station”
- Run an Express Check-In! Test Express to work out any logistical issues
How do we get parents on board?
- Communication is key
- Share the KidCheck Express Parent Communication Toolkit, which includes introduction video, letters, instructions and signage
Express Check-In: Things to Consider
Consideration #1: Clearly Define the Express Station and the Kiosk Station
Express Check-In is in addition to your current kiosk (computer or tablet) check-in stations. You will want to clearly define that the check-in process will be a different process and in most cases in a different area. We recommend separating your Express Check-In station from your kiosk station to help show parents the difference, and show they don’t need to wait in a check-in line.
- At a kiosk station, traditionally a parent will walk to the tablet or computer to enter in their phone number or scan a keytag to pull up their profile and check-in their child. Depending on the number of families checking in there may be a line.
- With Express Check-In a parent will use the KidCheck App on their smartphone to “pre” check-in. The check-in is then queued on their phone until they are within range of the ExpressHub device. Once they are within range of the Express station the app will then allow them to submit the check-in. There will be no waiting in line!
Consideration #2: Explain to Parents How to Complete an Express Check-In
Communication is key! As mentioned in the first consideration, Express Check-In is a similar process, but it will be different than what parents are used to at a kiosk station. Be sure to take advantage of the available resources of the Roll Out Documents – in the Express Check-In Introduction Tools (To Give to Parents). There is a whole communication toolkit available with videos, parent letters, how-to instructions, and signs.
Consideration #3: Parents Can’t Check-In but Not Show Up
The way Express Check-In works, it’s impossible for a parent to check-in without actually being at your organization. A parent can only log into the KidCheck app and begin the Express Check-In process. They cannot submit/complete their check-in until they are within range of the ExpressHub device. The device is a Bluetooth beacon that will detect their phone, generally ~200’, and allow them to complete the check-in.
Consideration #4: Label the Printers during ExpressHub Setup
Again, communication is key! When your organization sets up the ExpressHub device and attaches the printer you have an option to rename your label printers. We recommend naming them “Express Check-In Printer #X” or something similar. This way when a parent arrives and is in the KidCheck app completing an Express Check-In, they will see the correct printer to print to. It is also recommended to have signage at the Express Check-In printer station area.
Consideration #5: Enable Express Check-In
You don’t want your Sunday check-in to be available on a weekday. That’s why there’s an extra step of enabling your Templates/Programs to run on a specific day. Remember to log into go.kidcheck.com and under your “Check-In” tab select the “Express” tab. Here you can enable which days you want your Templates/Programs to be available for Express Check-In.
Keep in mind that Express Check-In is additional to your current check-in station, whether that be a tablet or a computer. A kiosk station is necessary as a check-in station in case you have visitors or families who don’t have smartphones or may not want to participate in Express Check-In.
Consideration #6: Test Express Check-In After Initial Set Up
Once your ExpressHub device is all set up (including the settings enabled and licensed) complete an Express Check-In! Don’t let the first check-in be in the hands of the parents. You and your staff will want to walk through Express Check-In not only to see the process but also to find any possible work flow or logistical challenges in your set up.
Consideration #7: Don’t Use a Captive Portal Network
A captive portal is a web page which is displayed to newly connected users before they are allowed to fully connect to your organization’s network. When connecting to a captive portal network you will initially be asked to either login in with administrative credentials to that network or accept a license agreement. Captive portals are common in public areas where free WiFi is available or on mobile hotspots. You are not able to configure the ExpressHub device to a captive portal. Before purchasing a ExpressHub device, it’s always a good idea to consult with the party involved in setting up your network at your organization to see if they have any concerns of setting up Express Check-In.