Enabling Mobile Express Check-In
Note: We highly recommend using an ExpressHub with Express Check-In.
Before activating Express Check-in, you’ll want to make sure your account is set up for regular Check-In.
To see how parents complete an Express Check-In, click here.
1. To enable a template/program for Express Check-In:
- Login to go.kidcheck.com.
- Go to the Check-in tab > Express tab.
- Select +Add a Template or +Add a Program under Page Options on the left.
- On the window that opens, select the desired template/program.
- Once the template/program is added to your list, select the day(s) you want it available for Express Check-in.
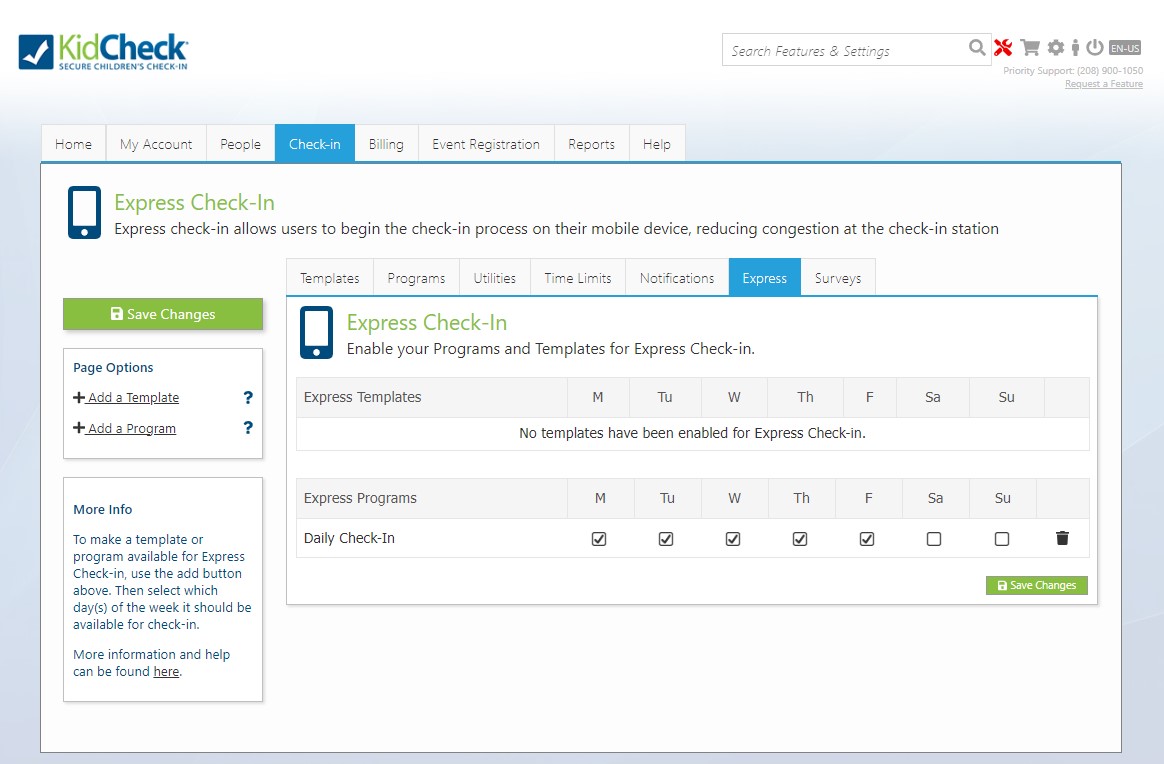
- Select the green Save Changes button.
2. To Enable an ExpressHub for Express Check-In:
(Note: To enable an ExpressHub for Check-In, you must have an available license. If you want to add a license to your account, contact KidCheck.)
- From an ExpressHub:
- Log into the ExpressHub interface using the config password
- Visit Settings > Licensing > Select the button to license
-
From the KidCheck App:
- After the KidCheck ExpressHub is set up, log into the KidCheck app on your tablet (iPad/Android) or Android phone/iPhone.
- Go to the Check-in area > Licensing (on the left) > ExpressHub Devices.
- Tap on the ExpressHub you want to activate for Check-In.
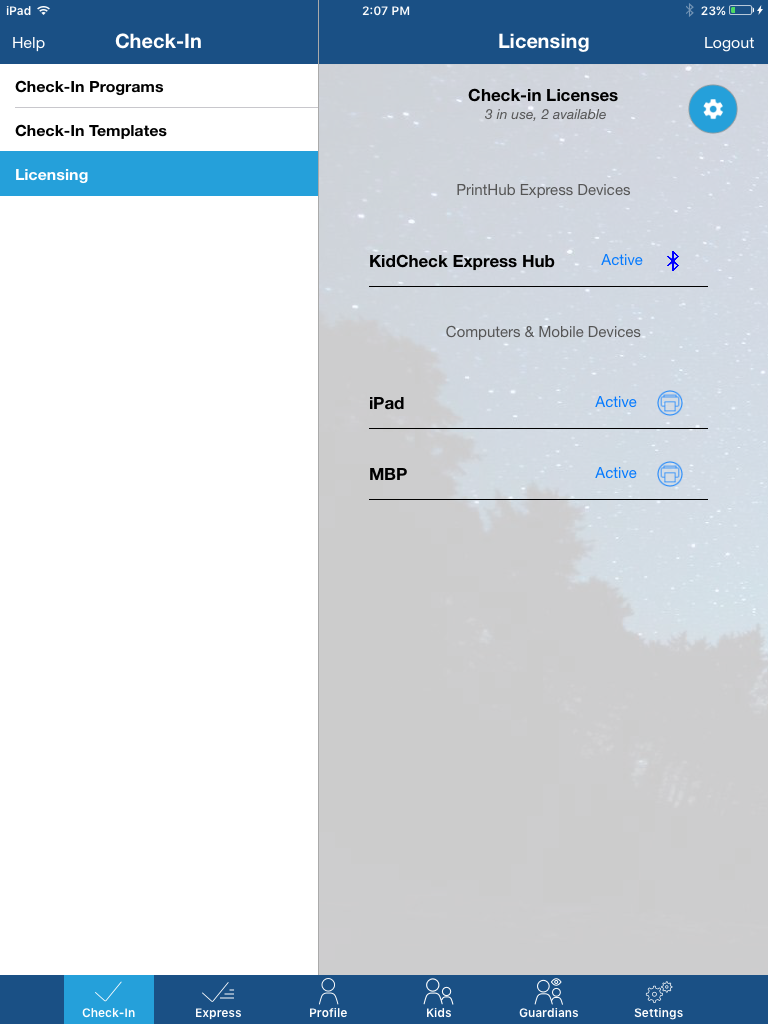
To enable an ExpressHub for Express Check-in, tap it in your “Licensing” list. It will change from “Disabled” to “Active.”
-
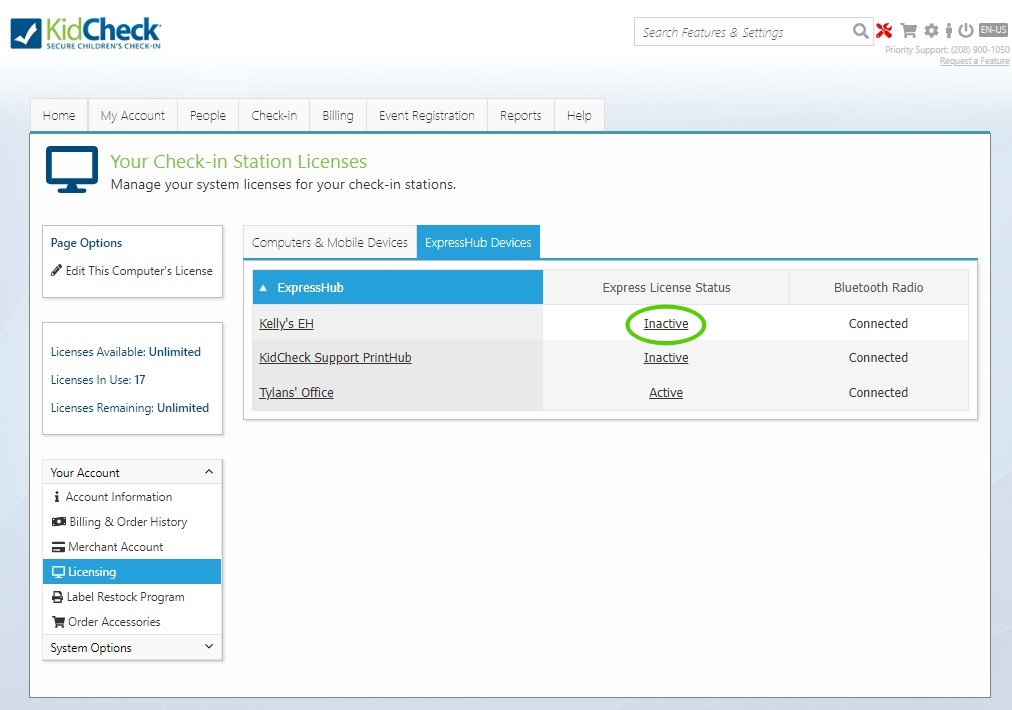
From the browser at go.kidcheck.com:
- After the KidCheck ExpressHub is set up, login to go.kidcheck.com.
- Go to the System Options gear (upper right) > Licensing on the left > the ExpressHub Devices tab.
- Select the “Inactive” link under the Express License Status column (the link will change to Active).