ExpressHub Setup
Use the KidCheck ExpressHub to process Express Check-Ins and print from a mobile check-in station to a label printer.
Note: While the ExpressHub is the newest in the product line, if you are setting up a KidCheck PrintHub 3, instructions are found here.
Initial Setup
- Remove the ExpressHub from the box and plug it into power.
- Wait for it load (it should take about a minute).
- Once on the Home screen (it says Complete Your Express Check-In Here), tap the gear-icon in the upper left.
- Input the configuration password included in the Quick Start Guide with the ExpressHub or found in your ExpressHub Settings page. (Once entered, you will be taken to the ExpressHub’s Dashboard.)
- Tap the box with 1 Internet to set up the ExpressHub on Wifi (if you plan to run it on Ethernet and have it plugged into an active Ethernet connection, you can skip this step). Once connected, you’ll return to the Dashboard screen.
- Tap the box with 2 Registration to register the ExpressHub to your organization. Upon successful registration you’ll return to the Dashboard screen.
- If you plan to use the ExpressHub for Express Check-In, tap 3 License to enable it to process Express Check-Ins.
If at any point in the process you get lost or don’t know where to go, you can always tap the Dashboard button in the menu bar to return to the Dashboard.
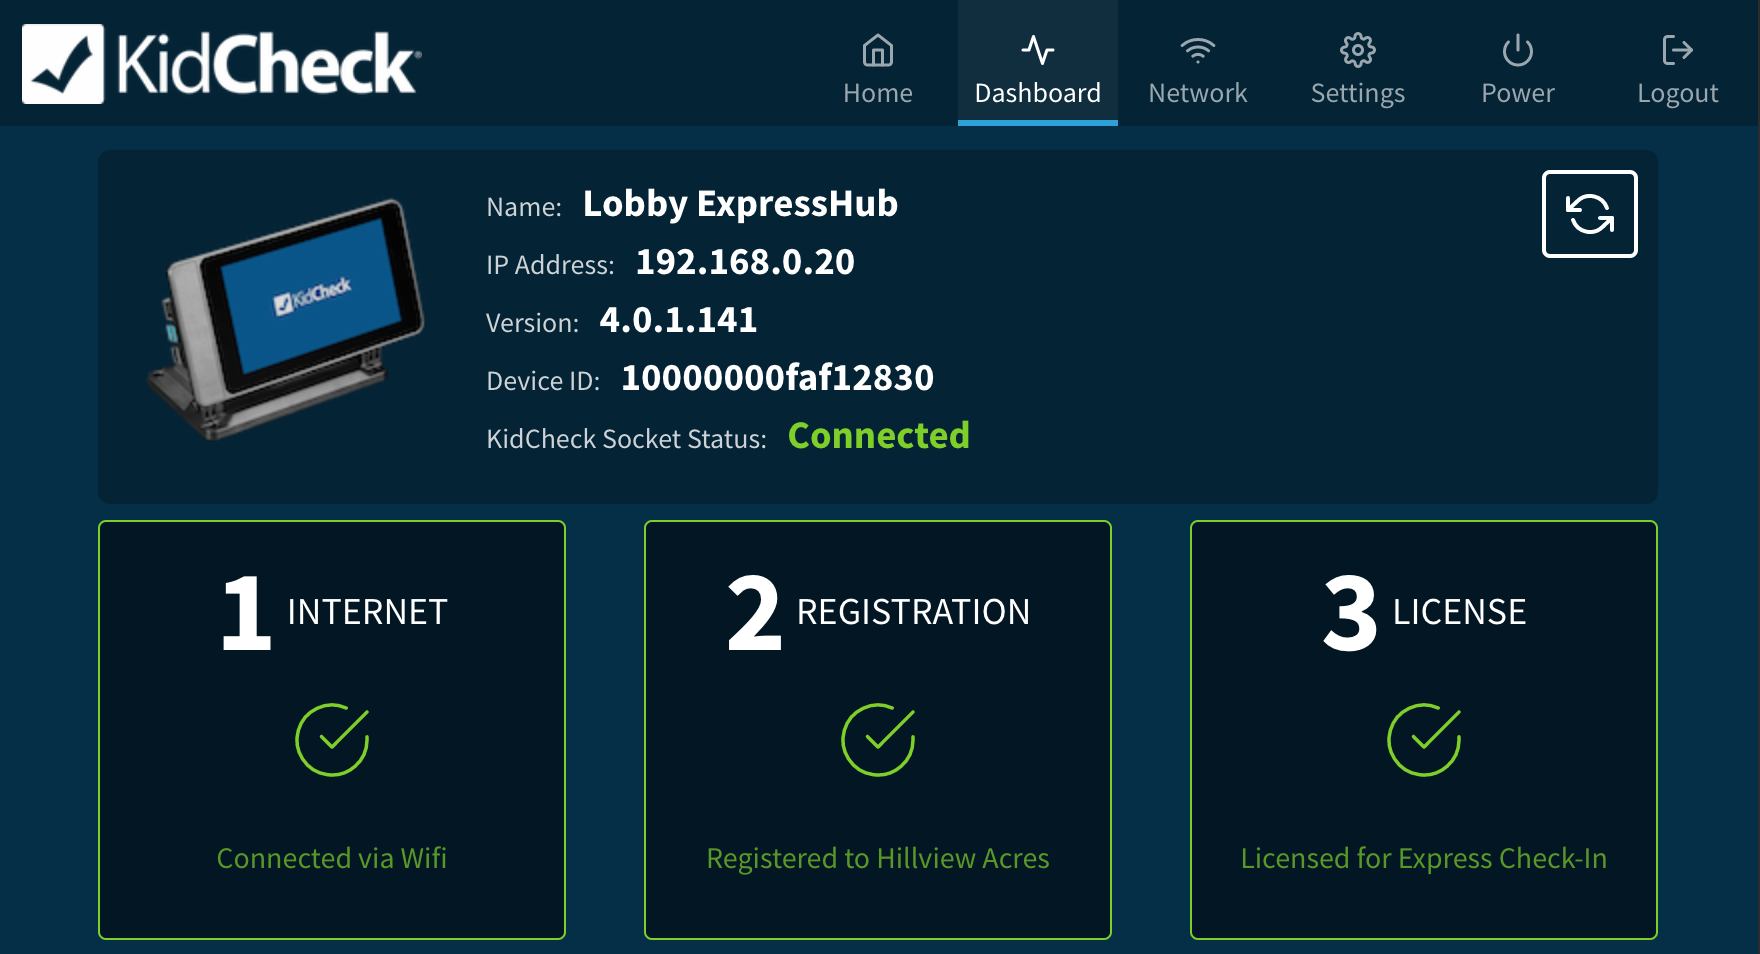
Use the ExpressHub’s Dashboard as the central place to set it up.
Settings
The ExpressHub can be further configured and personalized. To further configure it, once logged into the ExpressHub, tap the Settings button in the menu bar. This area allows you to make a variety of customizations and find additional technical information.
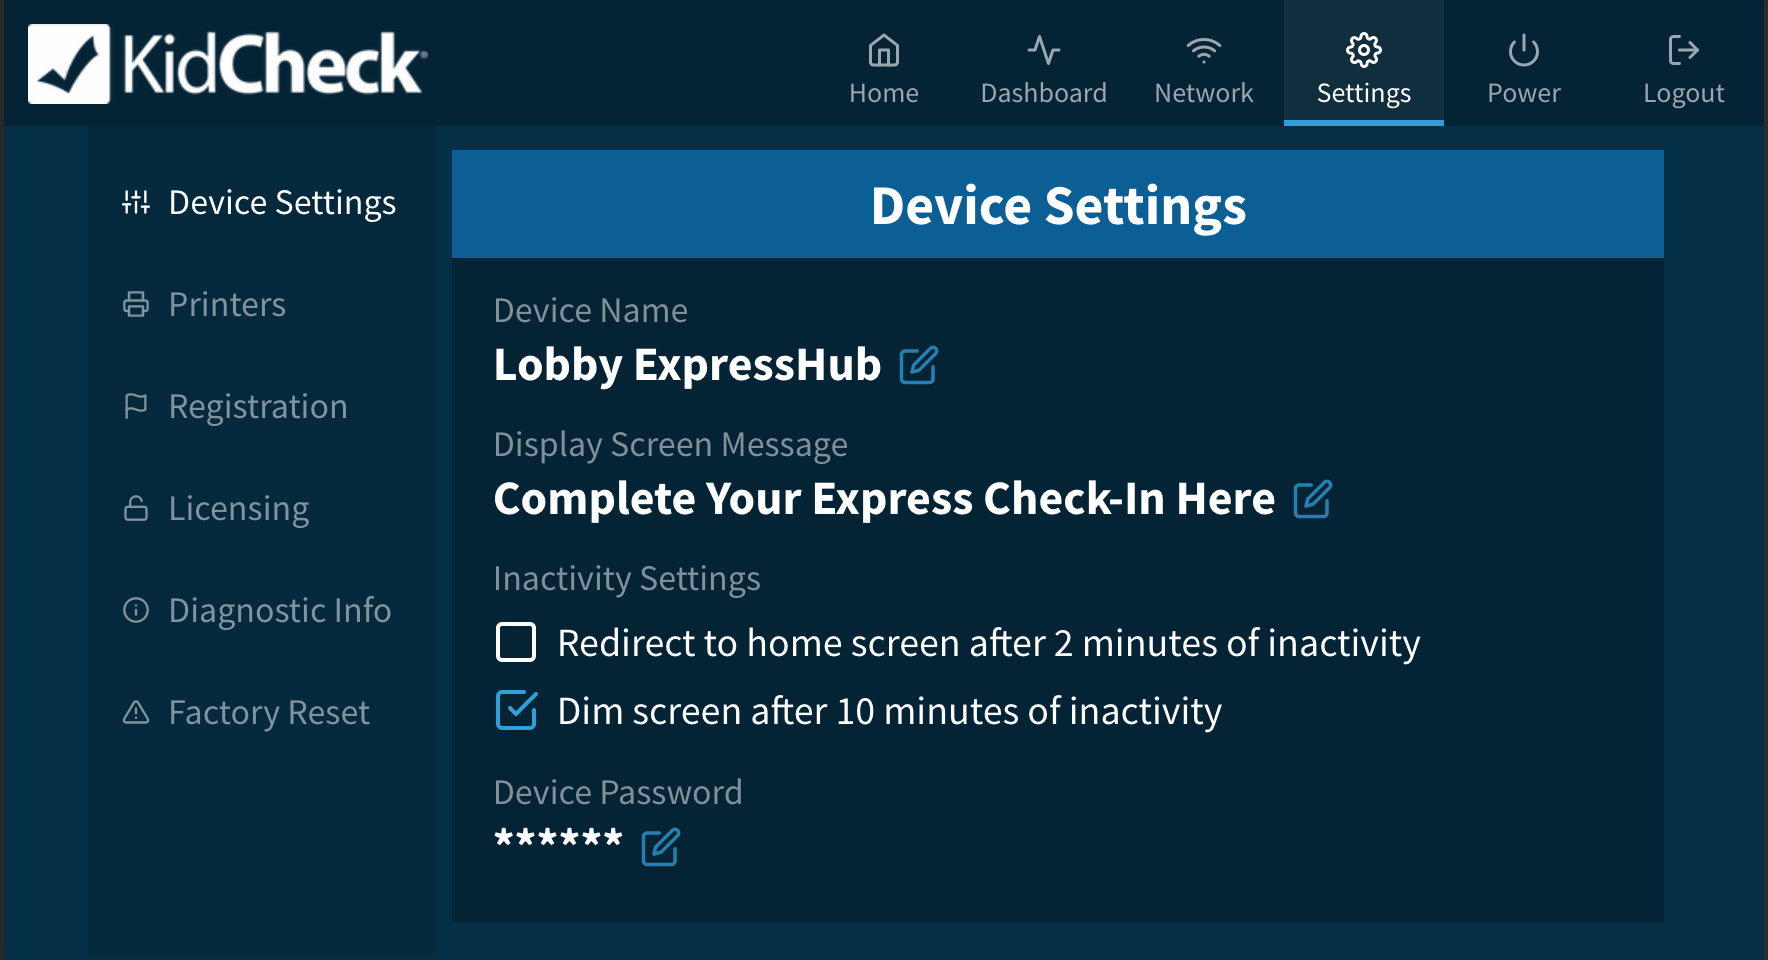
The ExpressHub’s Settings area allows you to configure and personalize the ExpressHub how you like.
Device Settings
Device Settings allow you to:
- Change the ExpressHub’s name (which is what guardians see when submitting Express Check-Ins and what you see in your license lists)
- Change the message seen on the ExpressHub’s Home screen
- Adjust power-saving and inactivity settings
- Change the configuration password
Printers
The Printers area allows you re-name any printer attached to the ExpressHub. It also allows you to print a test label to any attached printer.
Registration
Registration displays the organization the ExpressHub is currently registered to. If it’s not currently registered, it allows you to register it to an organization.
Diagnostic Info
Diagnostic Info displays technical information such as MAC addresses, network information, and information regarding connection to KidCheck’s servers.
Factory Reset
Factory Reset returns the ExpressHub back to factory settings – as if it were pulled out of the box for the first time.