Original KidCheck PrintHub Setup
Note: If you are setting up a KidCheck PrintHub Express, instructions are here.
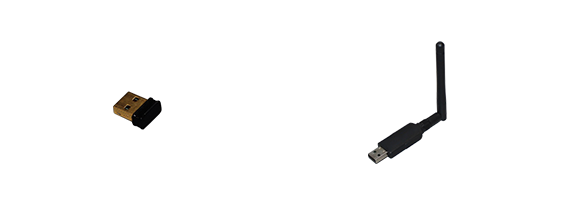
Before setting up your KidCheck PrintHub, you’ll need to unbox it, plug the WiFi dongle into a USB port of your PrintHub (if you’ll be connecting wirelessly to your network), and connect and plug in the power supply. The WiFi dongle will look like one of these pictures:
There are three easy options for setting up a KidCheck PrintHub:
Option A. Auto Find
Note: for the PrintHub’s Auto Find feature to work, you must have a computer (running the KidCheck Client) currently connected to your network.
- Plug the PrintHub into an active Ethernet cable on your network and power it on.
- Wait 5 minutes for the hub to power up and identify itself on your network by talking with a running KidCheck Client on one of your computers.
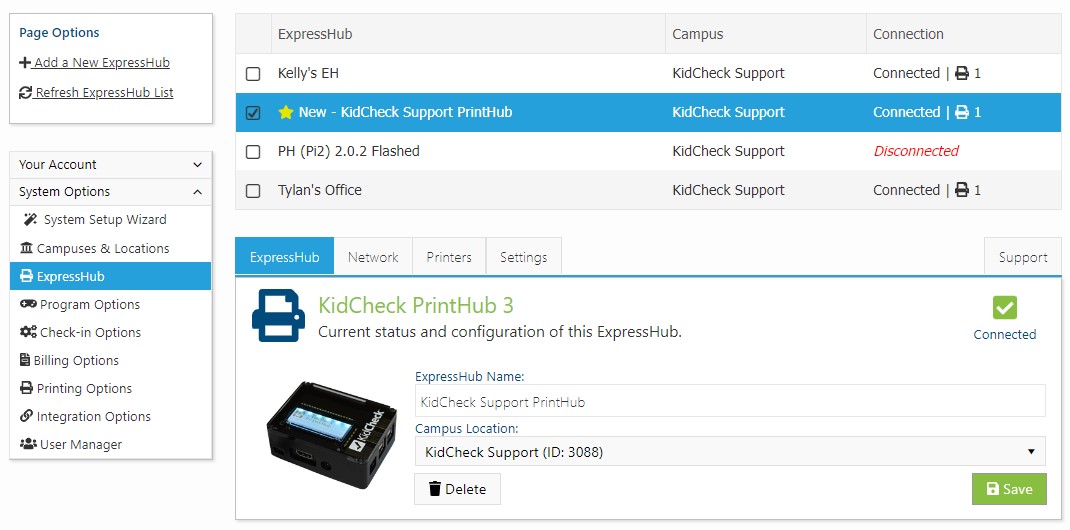
- Log in to KidCheck and navigate to the ExpressHub section of Settings: System Settings (gear in upper right) > System Options (menu on the left) > ExpressHub (menu on the left)
Option B. Scan to Find
- Plug the PrintHub into an active Ethernet cable on your network and power it on.
- Wait 5 minutes for the hub to power up and identify itself on your network.
- Log in to KidCheck from a computer on your network and navigate to the ExpressHub section of Settings: System Settings (gear in upper right) > System Options (menu on the left) > ExpressHub (menu on the left)
- If you don’t see your printhub automatically listed, select the +Add a New ExpressHub link on the left.
- If your device’s IP address automatically populates in the new window, select Start Scan to search for your PrintHub on that network. If the device’s IP isn’t automatically populated, look up the device’s IP, input it in the appropriate field, and select Start Scan.
- Name the found PrintHub(s), select the appropriate campus, select the green Save Discovered Printers button, and close that tab when prompted to do so.
- Select the Refresh ExpressHub List link on the left of the original ExpressHub settings page.
Option C. Connect to a Monitor
- Connect your PrintHub to a monitor using an HDMI cable (a monitor or television will work, a laptop or all-in-one computer will not). Also, connect a keyboard and mouse to the PrintHub’s USB ports.
- Power on the PrintHub (optionally also connect the PrintHub to your network via an Ethernet cable before powering on).
- Once the PrintHub fully powers on, click Internet Access at the top > select the WiFi area > select your network and input the network password. (Or if you plan on running on Ethernet, ensure an Ethernet connection is detected. Choose Esc if you do not have an option go back to the KidCheck PrintHub Express Menu )
- Click the Please Register This Device at the top.
- Input your KidCheck username and password and select your Campus.
- Log in to KidCheck from a device on your network and navigate to the ExpressHub section of Settings: System Settings (gear in upper right) > System Options (menu on the left) > ExpressHub (menu on the left)
Now that your PrintHub has been found:
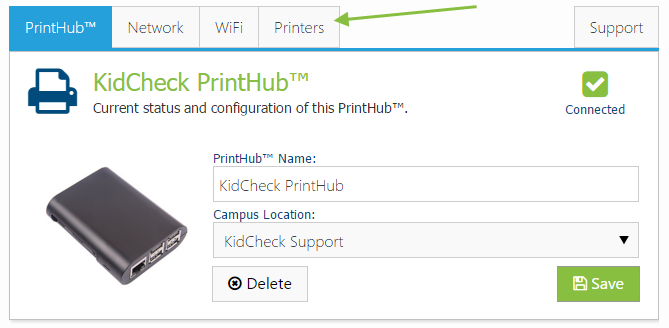
- Select your newly identified PrintHub from the list.

- Select the appropriate tabs to connect to your WiFi (if needed), rename your PrintHub/printer, complete a test print, etc.
For a video walk through on how to setup your 1st Generation PrintHub, click this link – 1st Generation PrintHub Setup Instructions .