PrintHub Troubleshooting (for 2nd & 3rd Generation PrintHubs)
Note: If you need to set up your (2nd & 3rd gen) PrintHub for the first time, please see our setup tutorial.
If you don’t see your PrintHub listed when starting Check-in:
Ensure the PrintHub is listed as “Connected” in the Settings area of go.kidcheck.com
- If it is not Connected, reboot the PrintHub
- This is most easily done by unplugging power to the PrintHub for 10 seconds then plugging it back in
- Wait 90 seconds for it to boot up again
Make sure the PrintHub detects a printer in the Settings area of go.kidcheck.com
- If it does not:
- Make sure the printer’s power is plugged into power and responds when you push the button on the front of it
- Unplug/replug the printer from the USB port of the PrintHub
- Unplug/replug the printer cable on the bottom of the printer
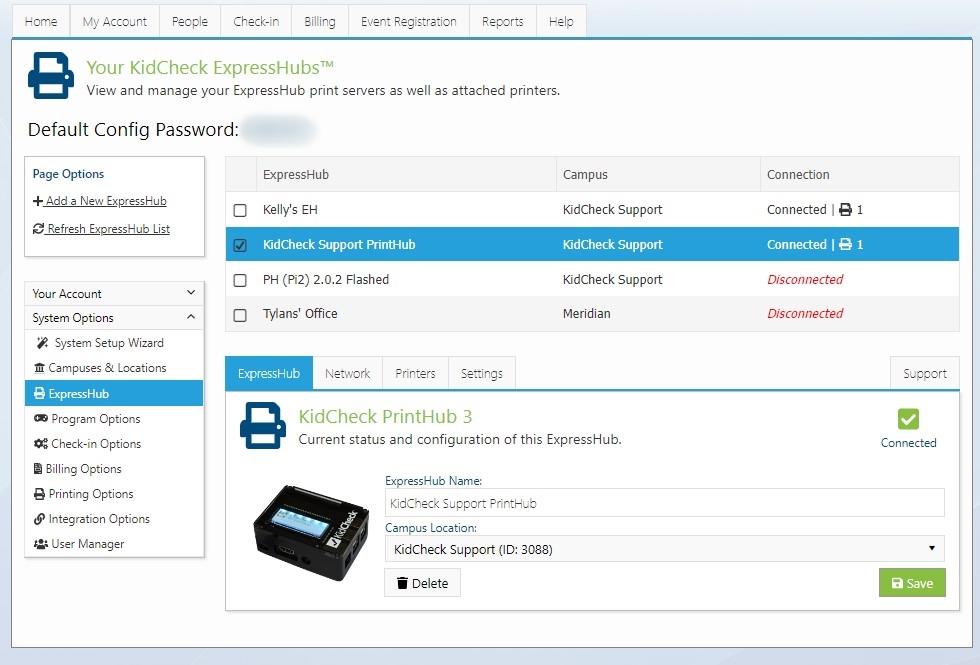
Find a PrintHub’s status and how many printers are attached from the “Settings” area of go.kidcheck.com.
Once the PrintHub/printer’s status changes, refresh the PrintHub list on the left of the page.
If the PrintHub/printer is now seen as Connected, restart your template/program within the mobile app.
Make sure the Campus of the PrintHub matches the Campus of the device you’re starting Check-in on (seen in Licensing).
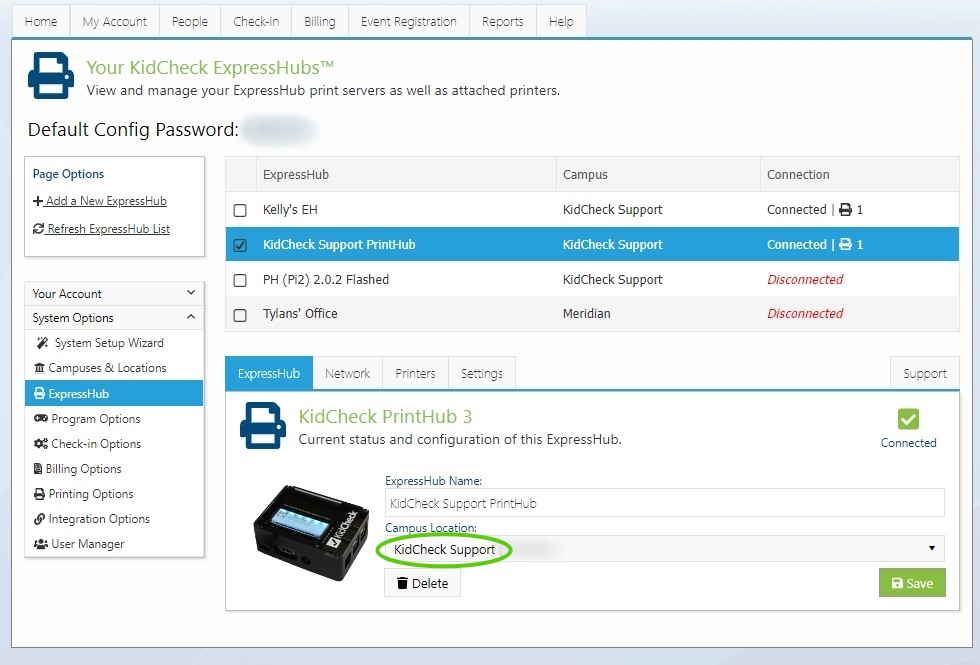
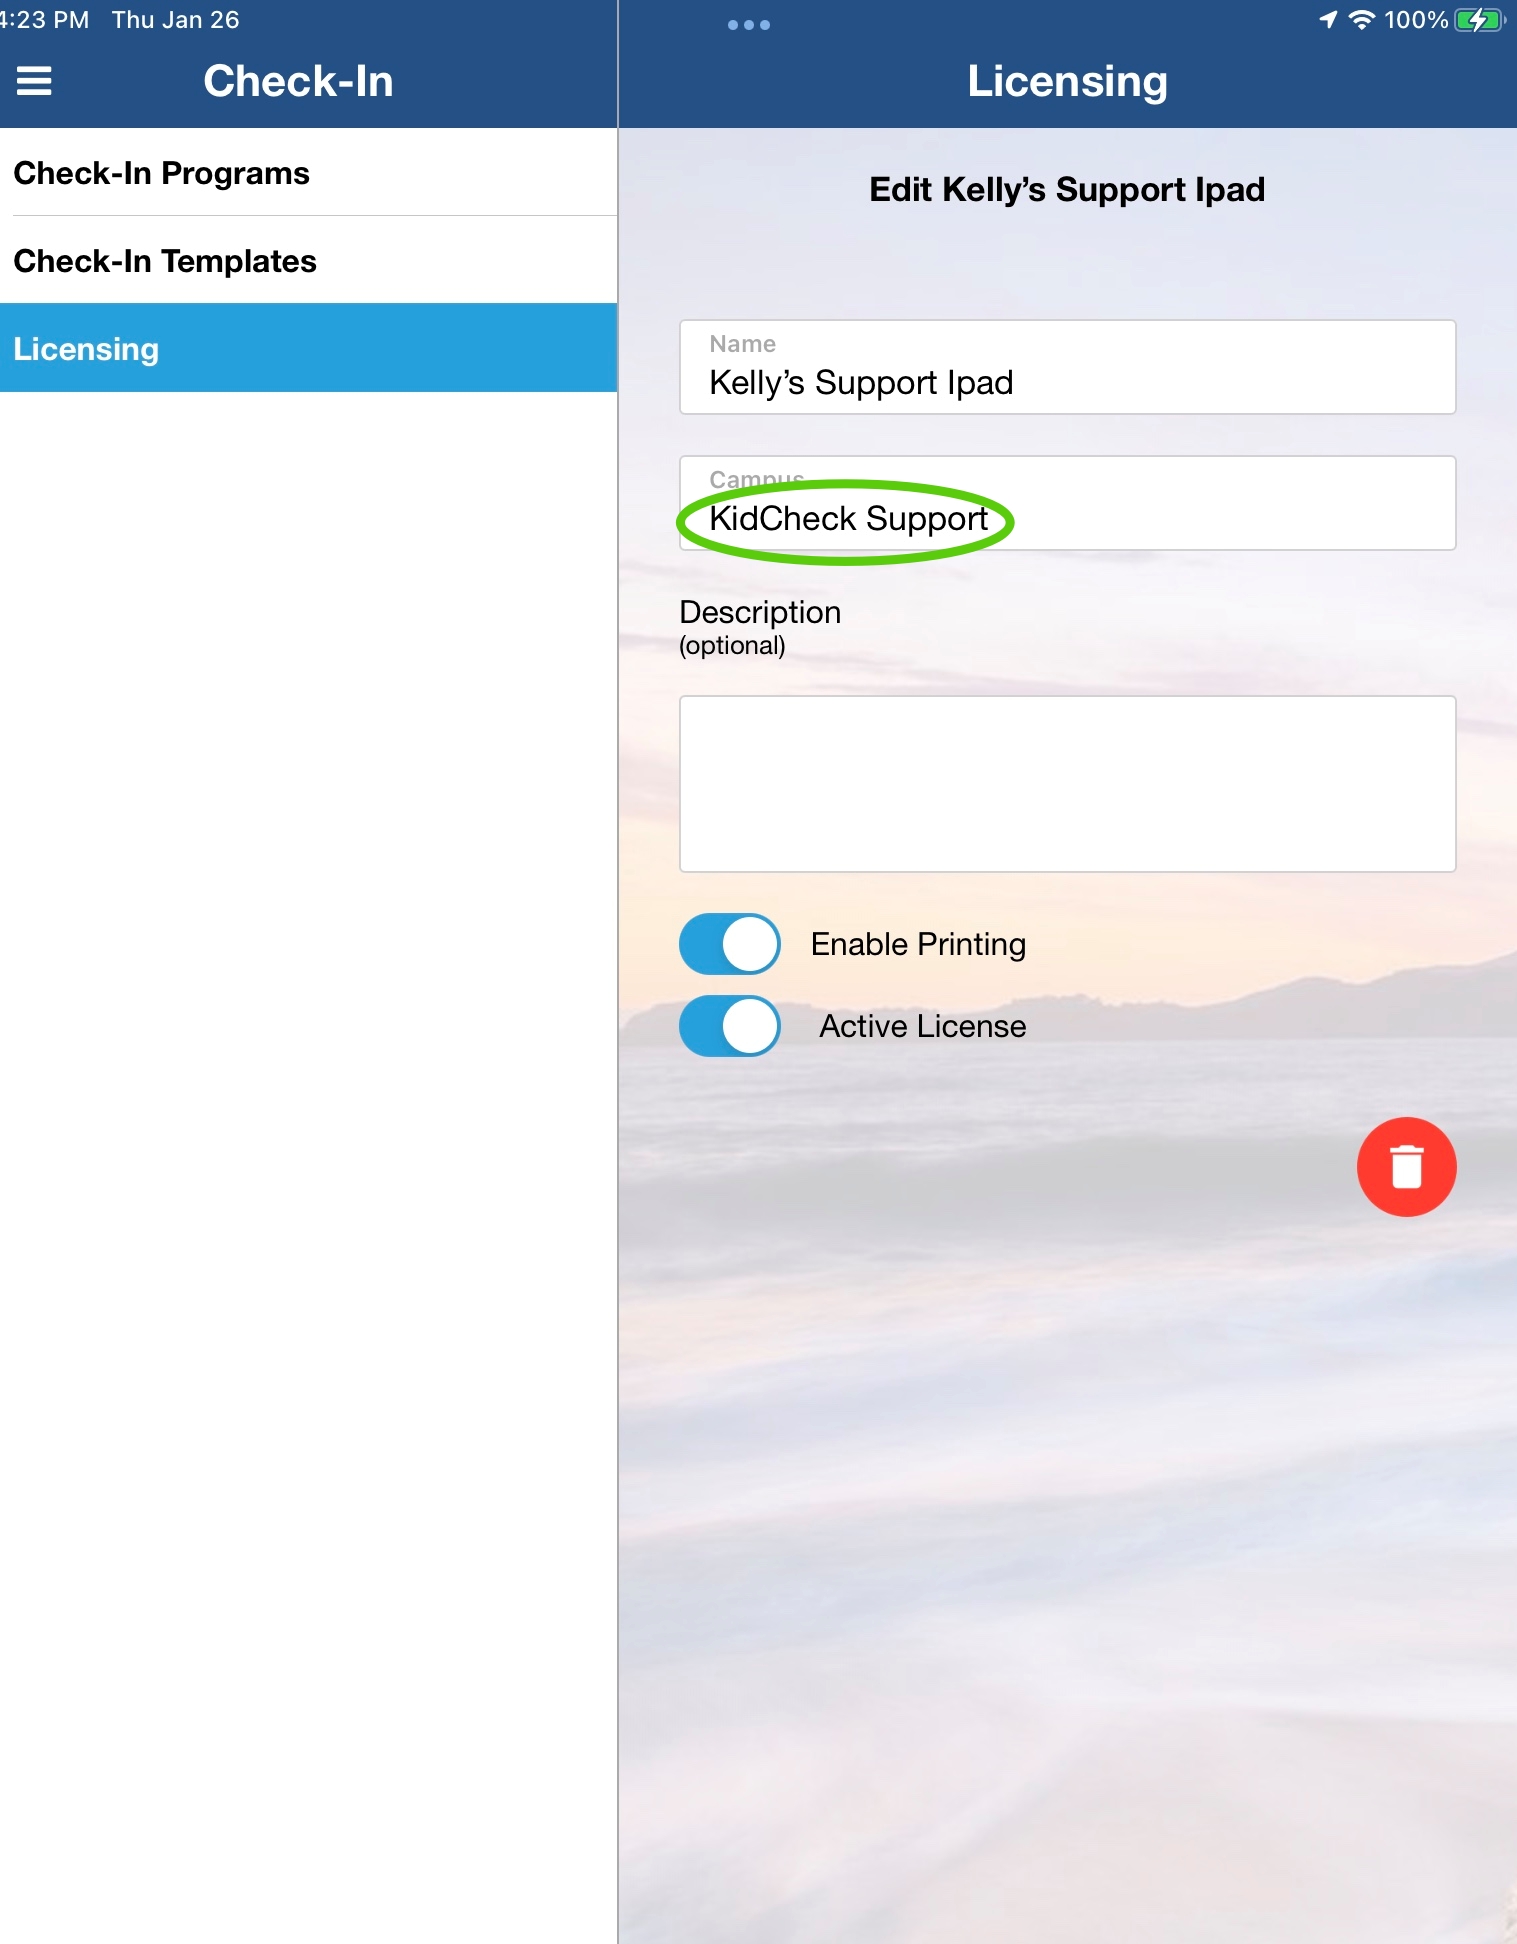
Make sure the Campus of your PrintHub Express matches the Campus on the License of the device you’re using.