Using the KidCheck PrintHub Configuration App (for 2nd & 3rd Generation PrintHubs)
Before setting up your KidCheck PrintHub, please make sure that Panda Wireless adapter is attached to any USB port and the power supply is attached to the PrintHub.
In order to get the app, you must search for KidCheck Printhub Setup from the Google Play Store or Apple App Store and download it.
- Plug the Printhub into power and wait for it to fully boot (LCD screen should say “Connecting….”)
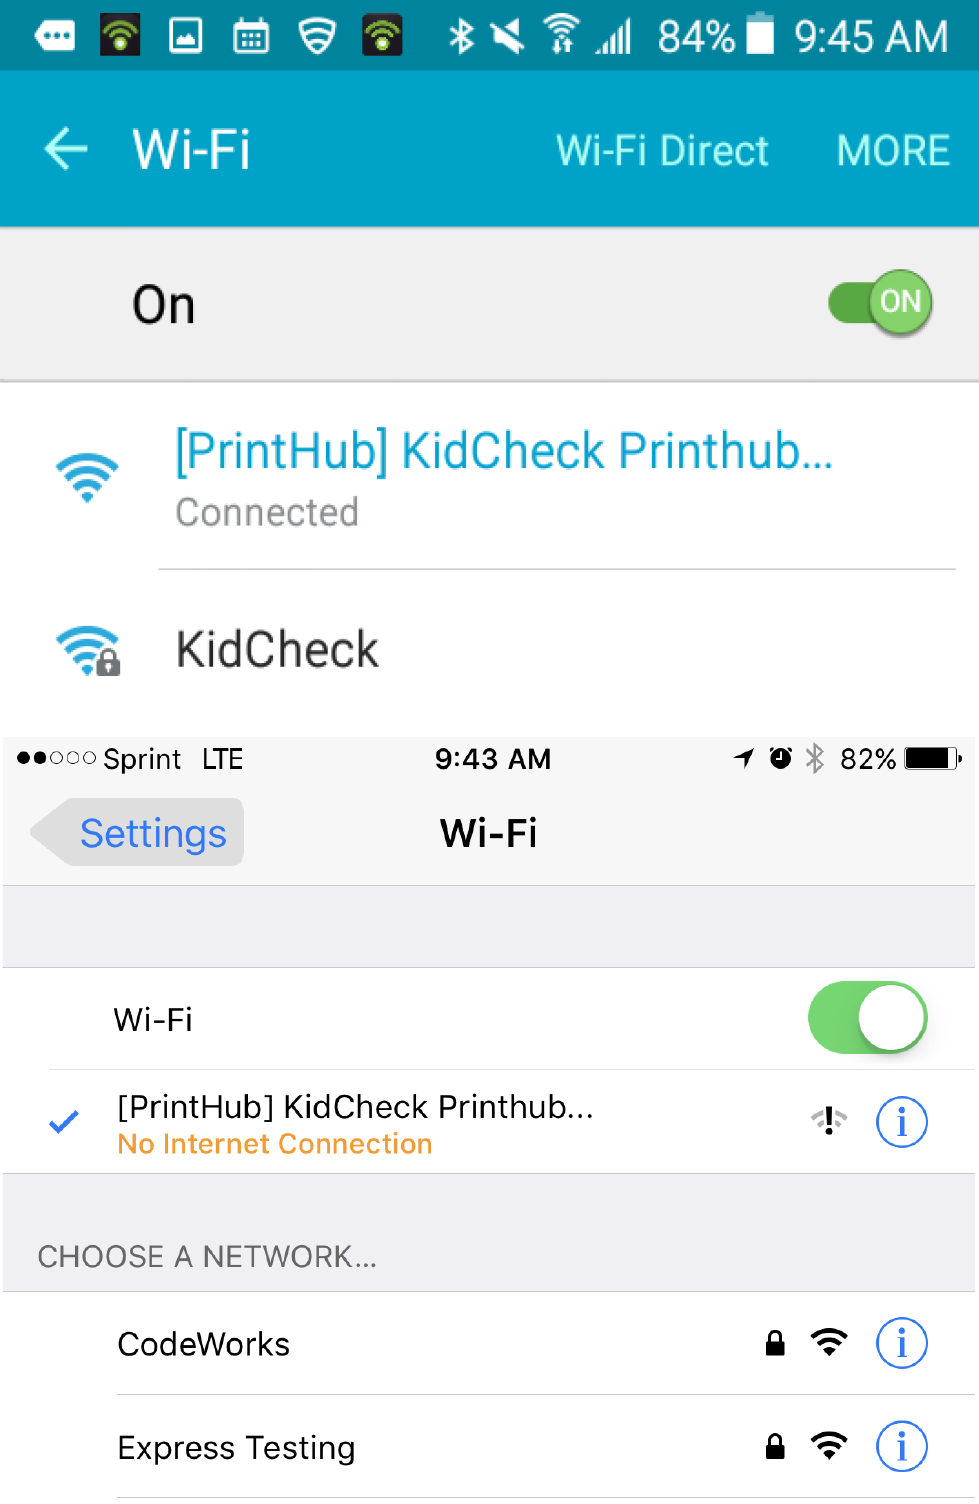
- From a tablet or smart phone, go to your settings and change the WiFi network to “KidCheck Printhub”

Note: It will say No Internet Connection; we are using this Access Point to remote into the device
- Open the KidCheck PrintHub Setup app (found in the Apple App Store or Google Play Store), hit Launch Setup
- Enter the configuration password (found within the PrintHub packaging or find here in Settings)
- Select the Internet section on the PrintHub App, and then select your desired wireless network and enter the network password to join it (if you want to run wireless)
- The network should be listed under Configured Networks and will say its connected (if done properly)
- If configured correctly, the Internet and KidCheck Connection button should be green
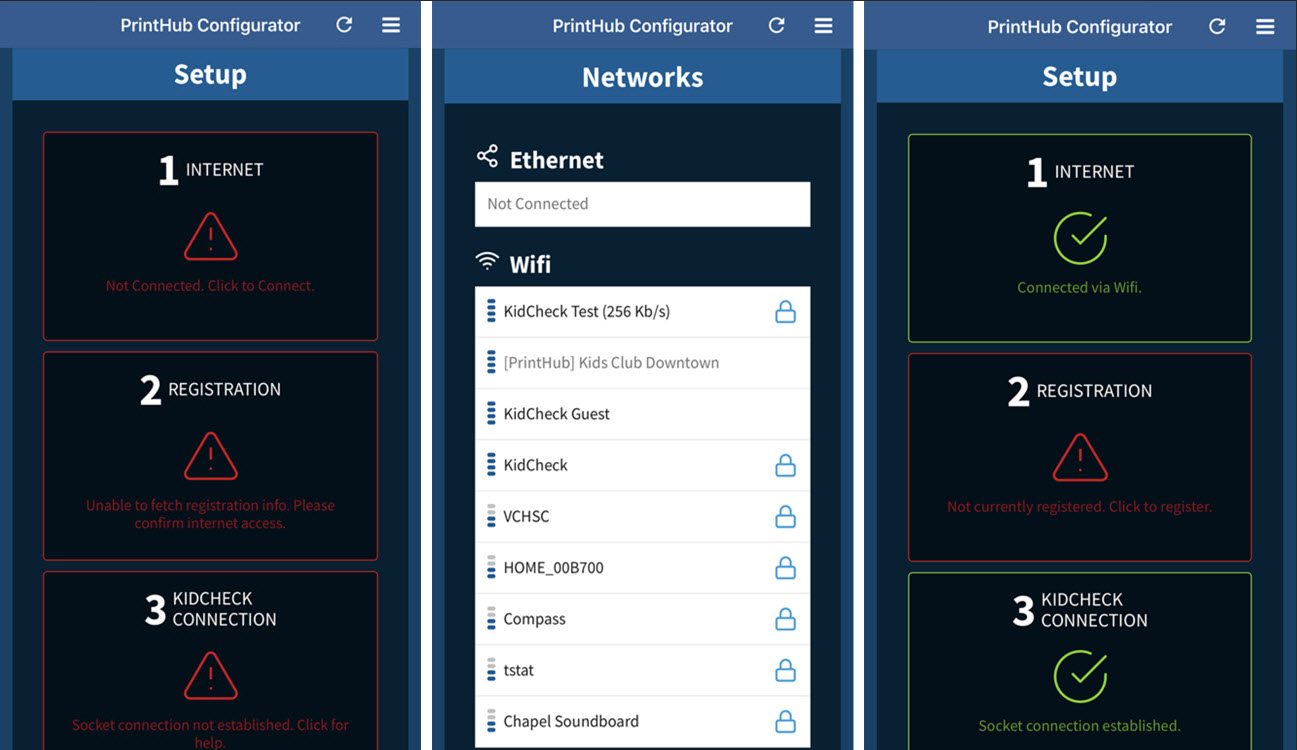
Once you see a green light on the appropriate boxes, then you have successfully set up the PrintHub Express correctly.
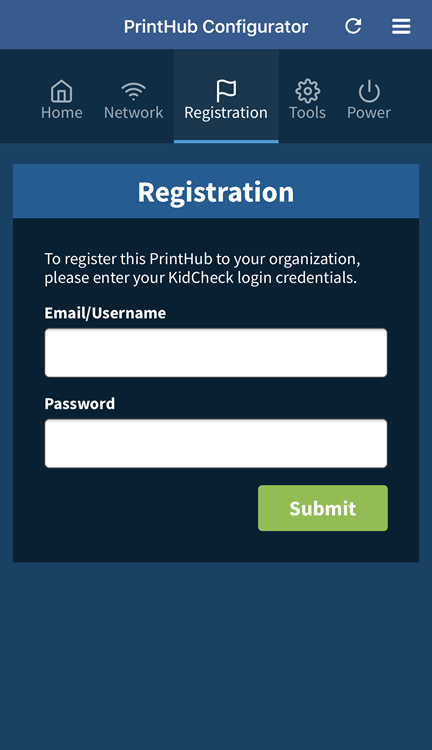
- Select Registration and enter your KidCheck username/password to register the PrintHub to your organization.
- Make sure to select the campus (for instant 2nd Campus, East Campus, KidCheck Support) before selecting the submit button.
If you have multiple Printhub Expresses, it is suggested to rename them to distinguish them apart from each other.
- Make sure to select the campus (for instant 2nd Campus, East Campus, KidCheck Support) before selecting the submit button.
- The PrintHub is ready to use. (You can select the other areas to further configure it, if needed).