Volunteer Scheduling – KidCheck Admin App
In this tutorial, you’ll learn to:
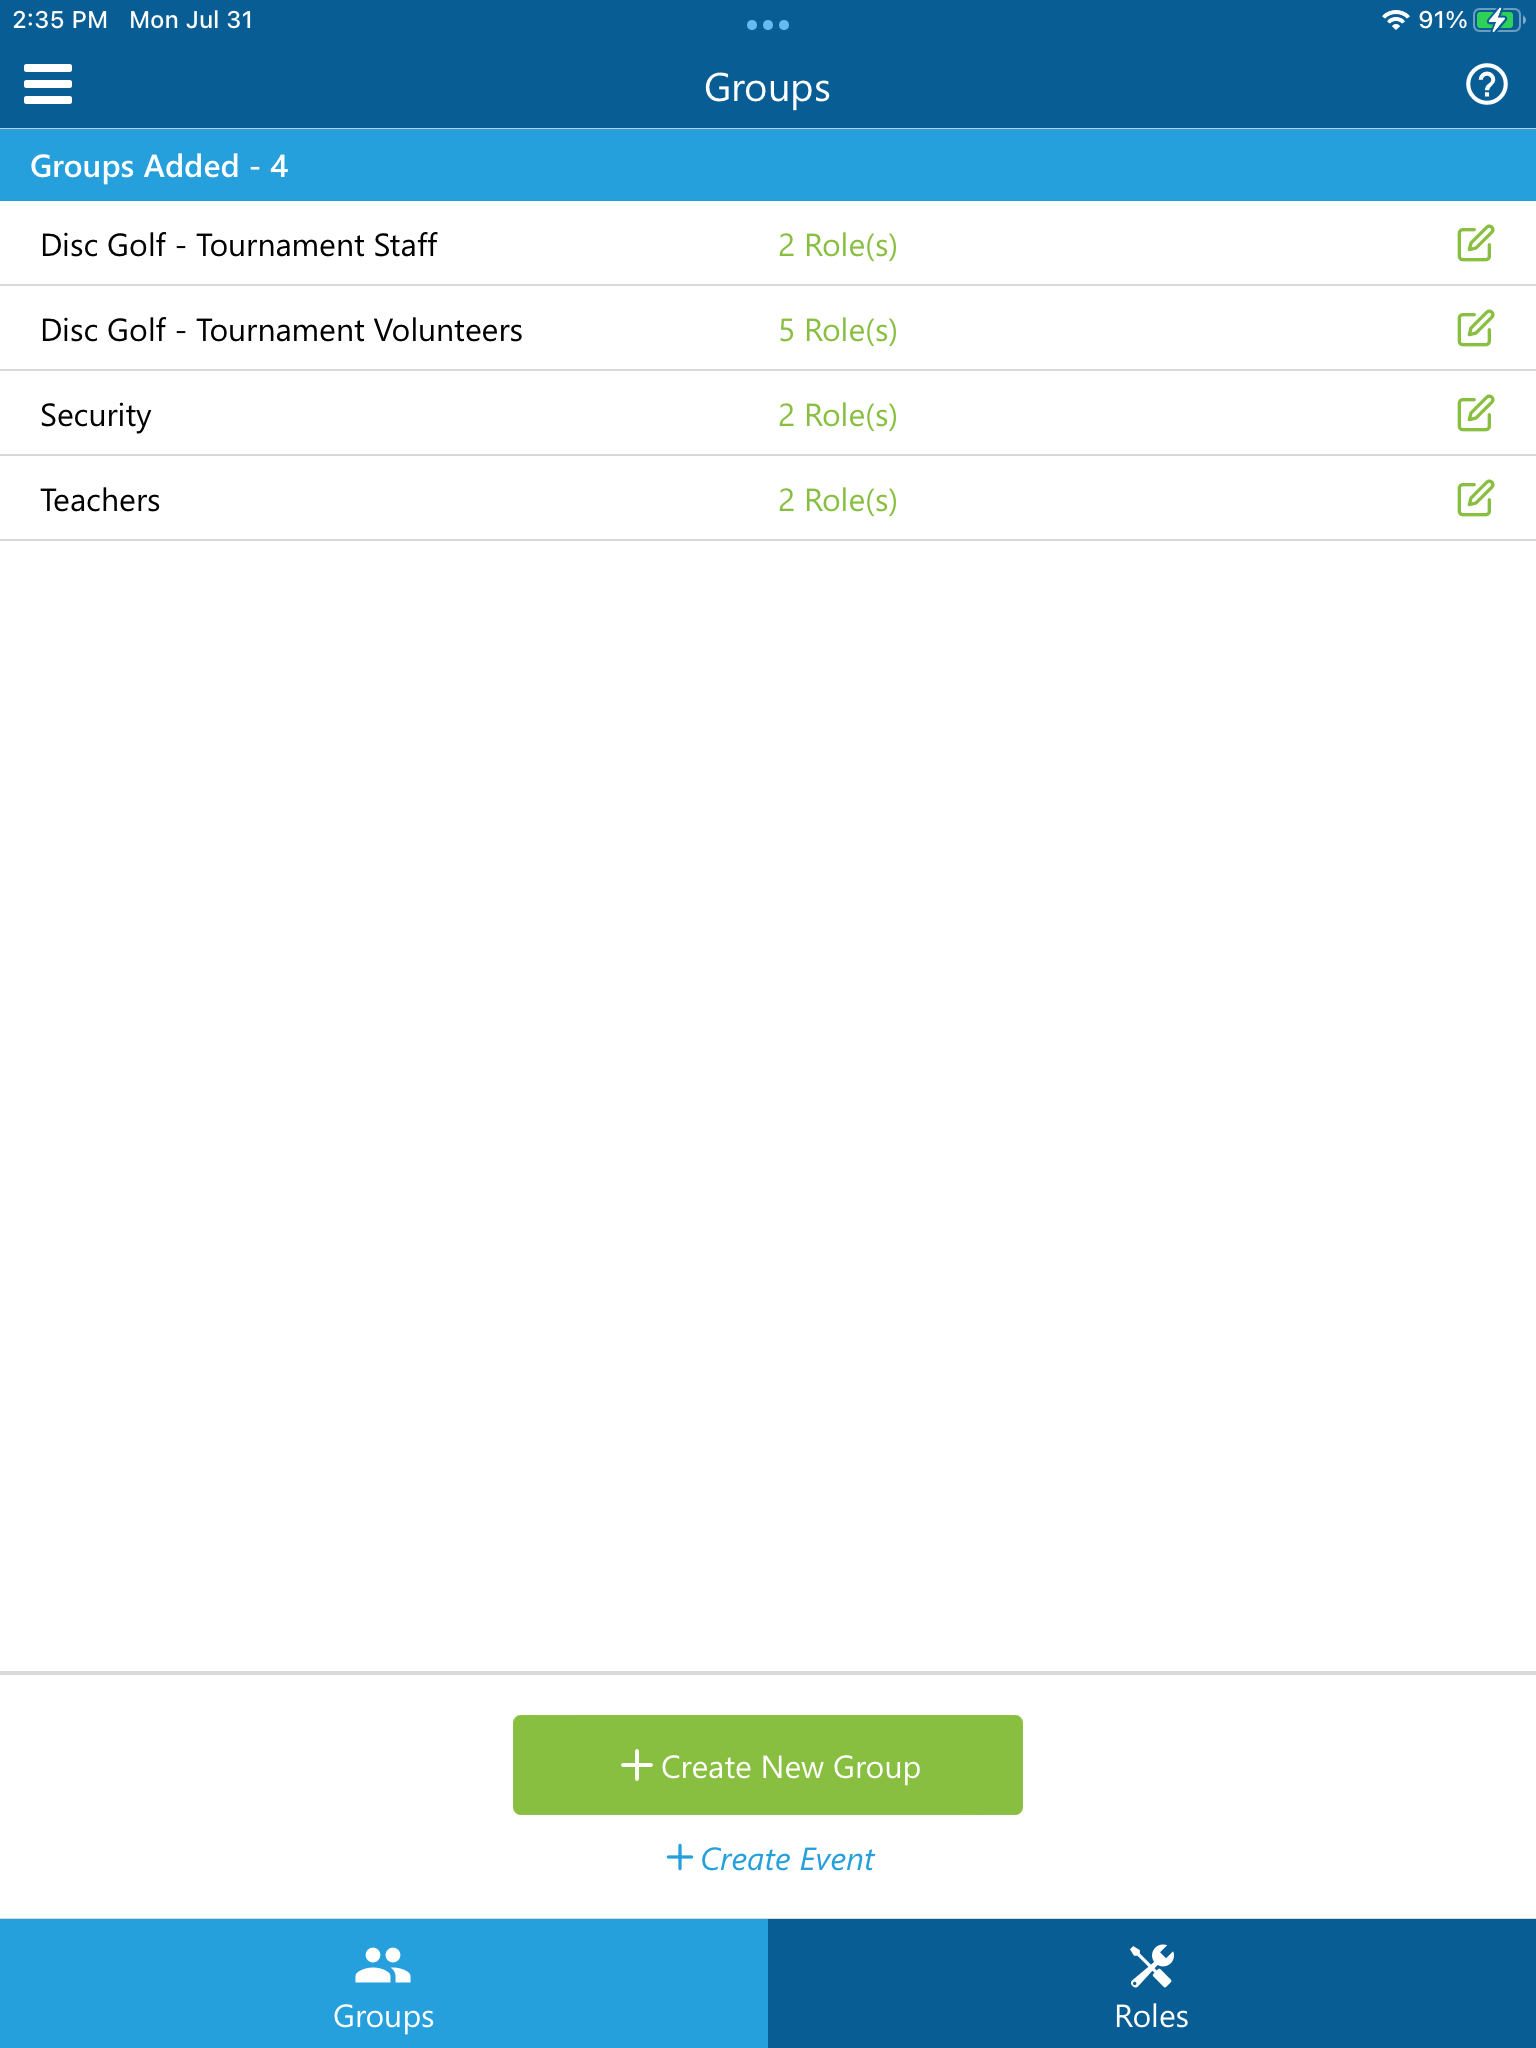
Create Groups and Roles
Create Groups and Roles
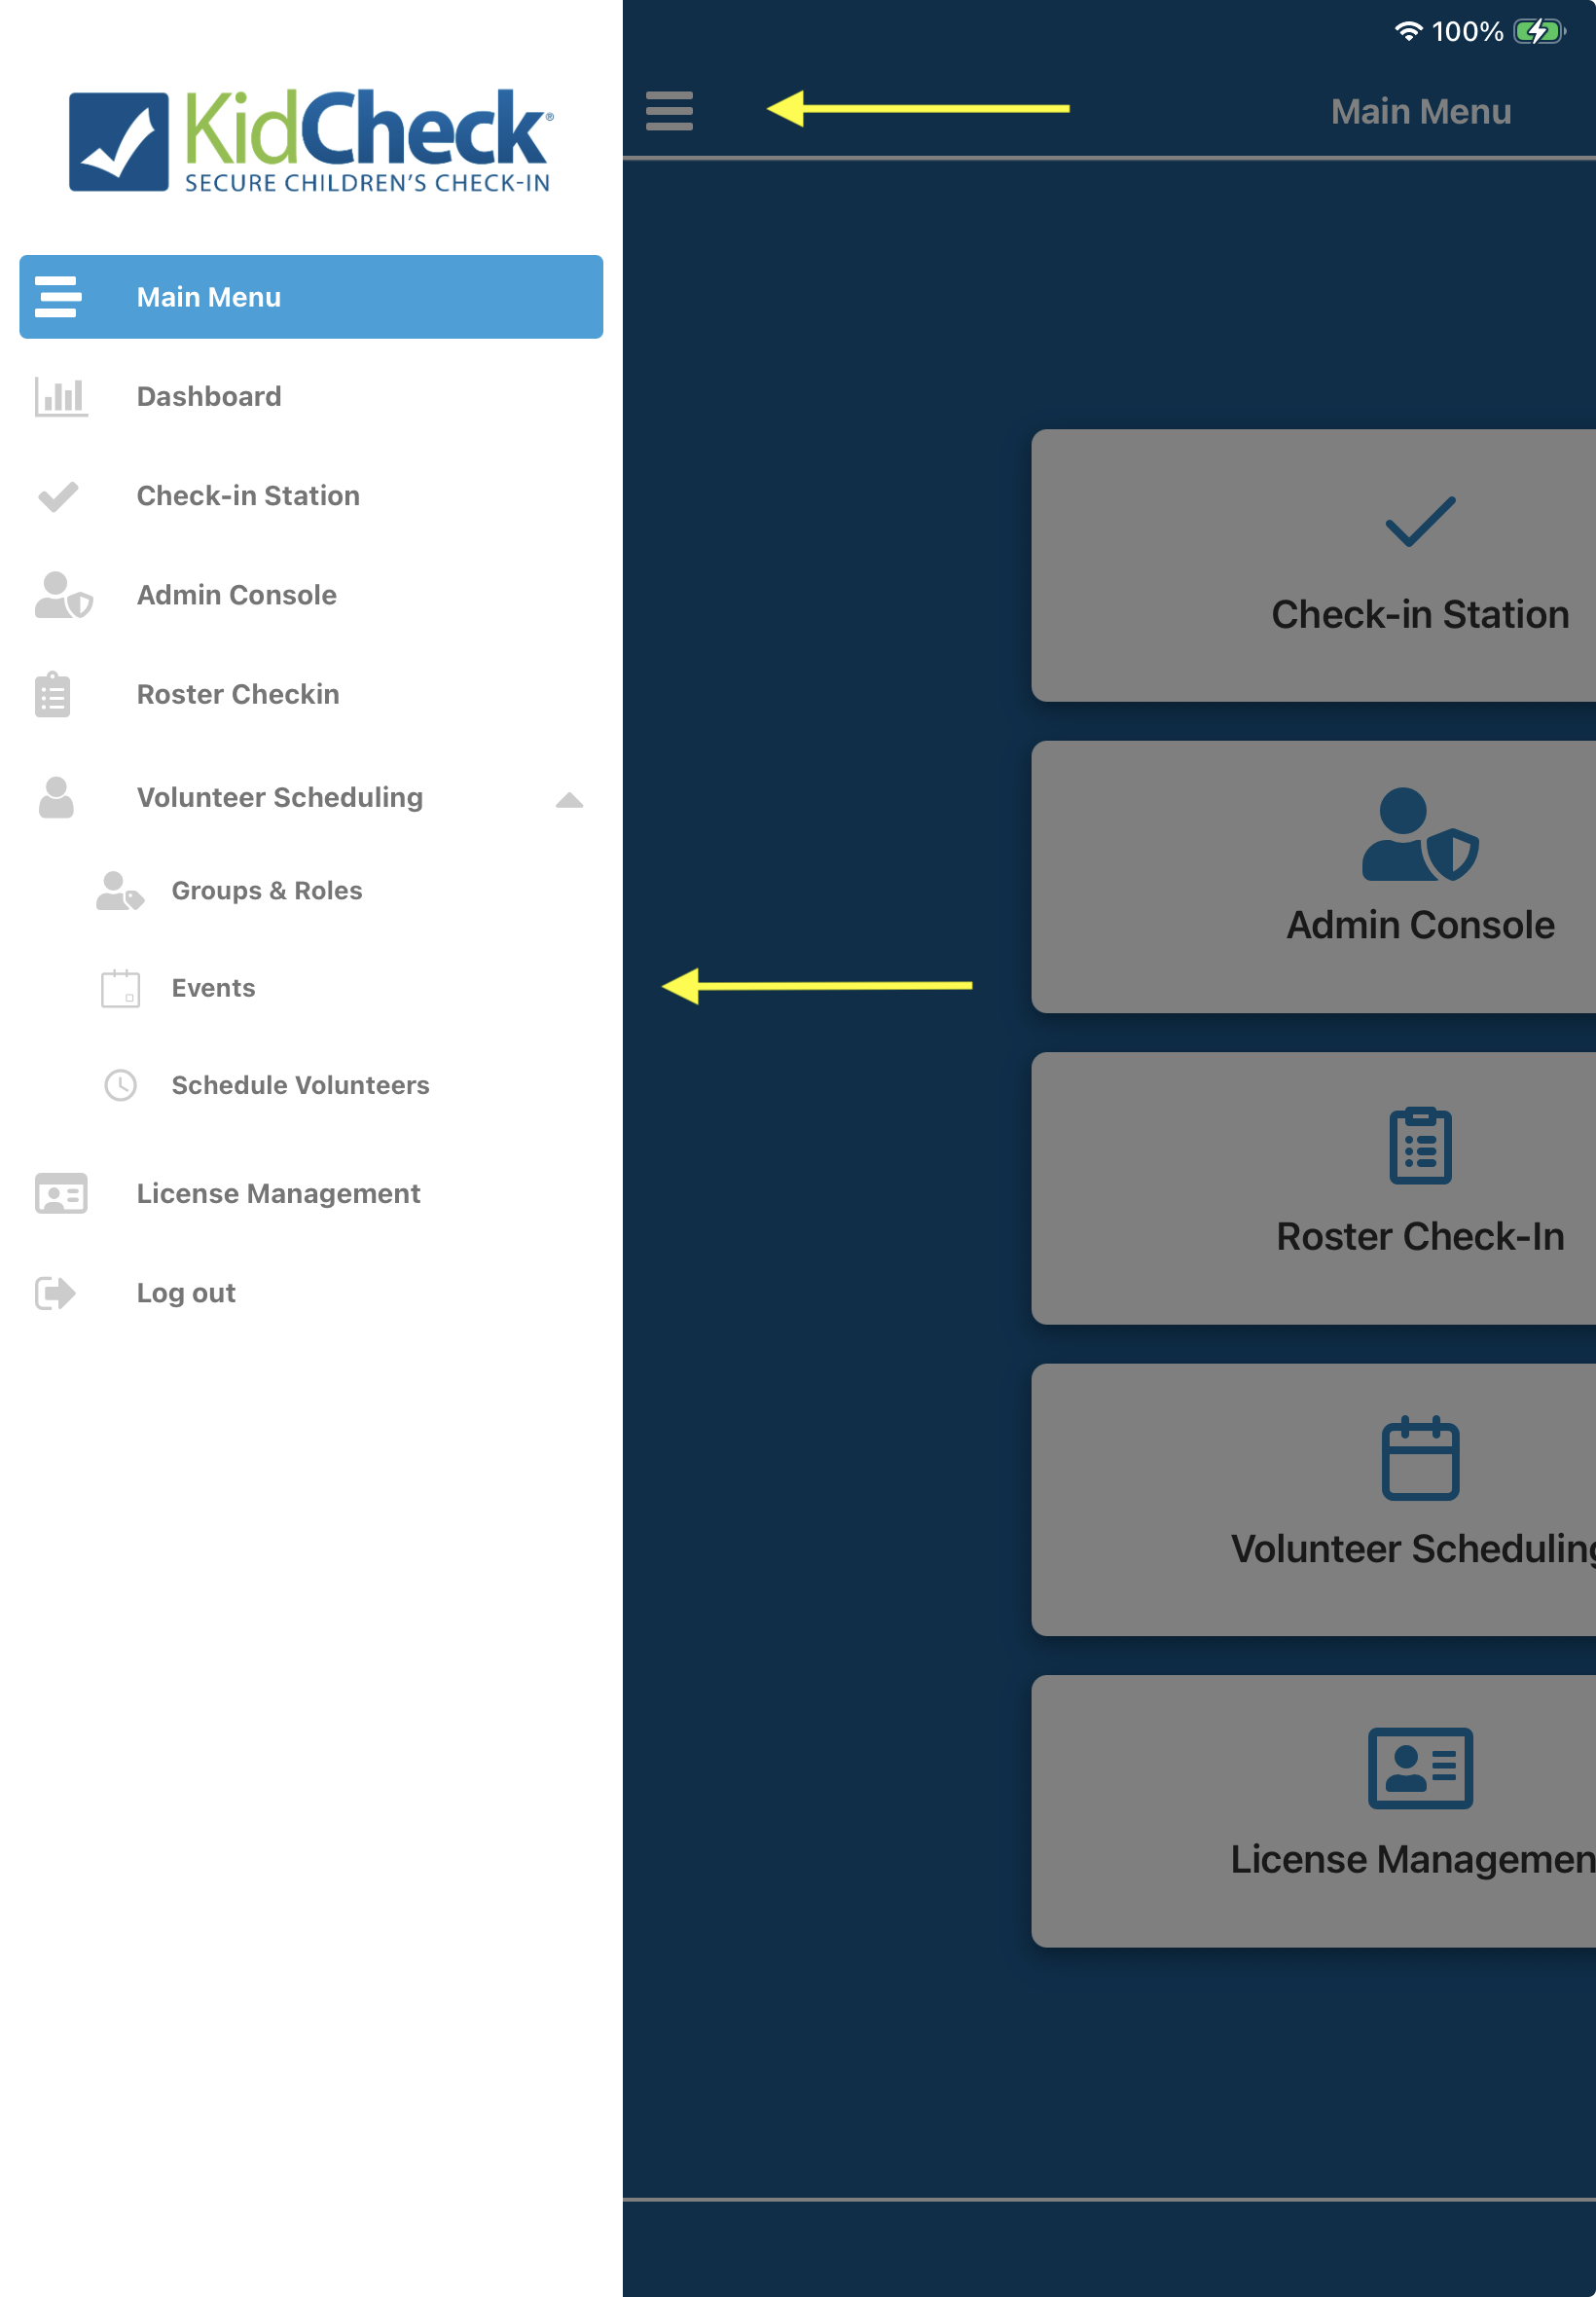
- Sign into the mobile KidCheck Admin App with your admin account
- Choose Volunteer Scheduling
- Choose the upper left hamburger menu>Volunteer Scheduling>Groups & Roles
- Choose +Create New Group from the groups tab, add a group name and Save (repeat step for all necessary groups for roles that will be created for events)
- Choose the Roles tab, then select +Create New Role and add a role name and Save (repeat step for all necessary roles that will be needed for events)
Create a New Event
- Once signed into the KidCheck Admin App with your admin account, select Volunteer Scheduling > Events from the upper left-hand menu
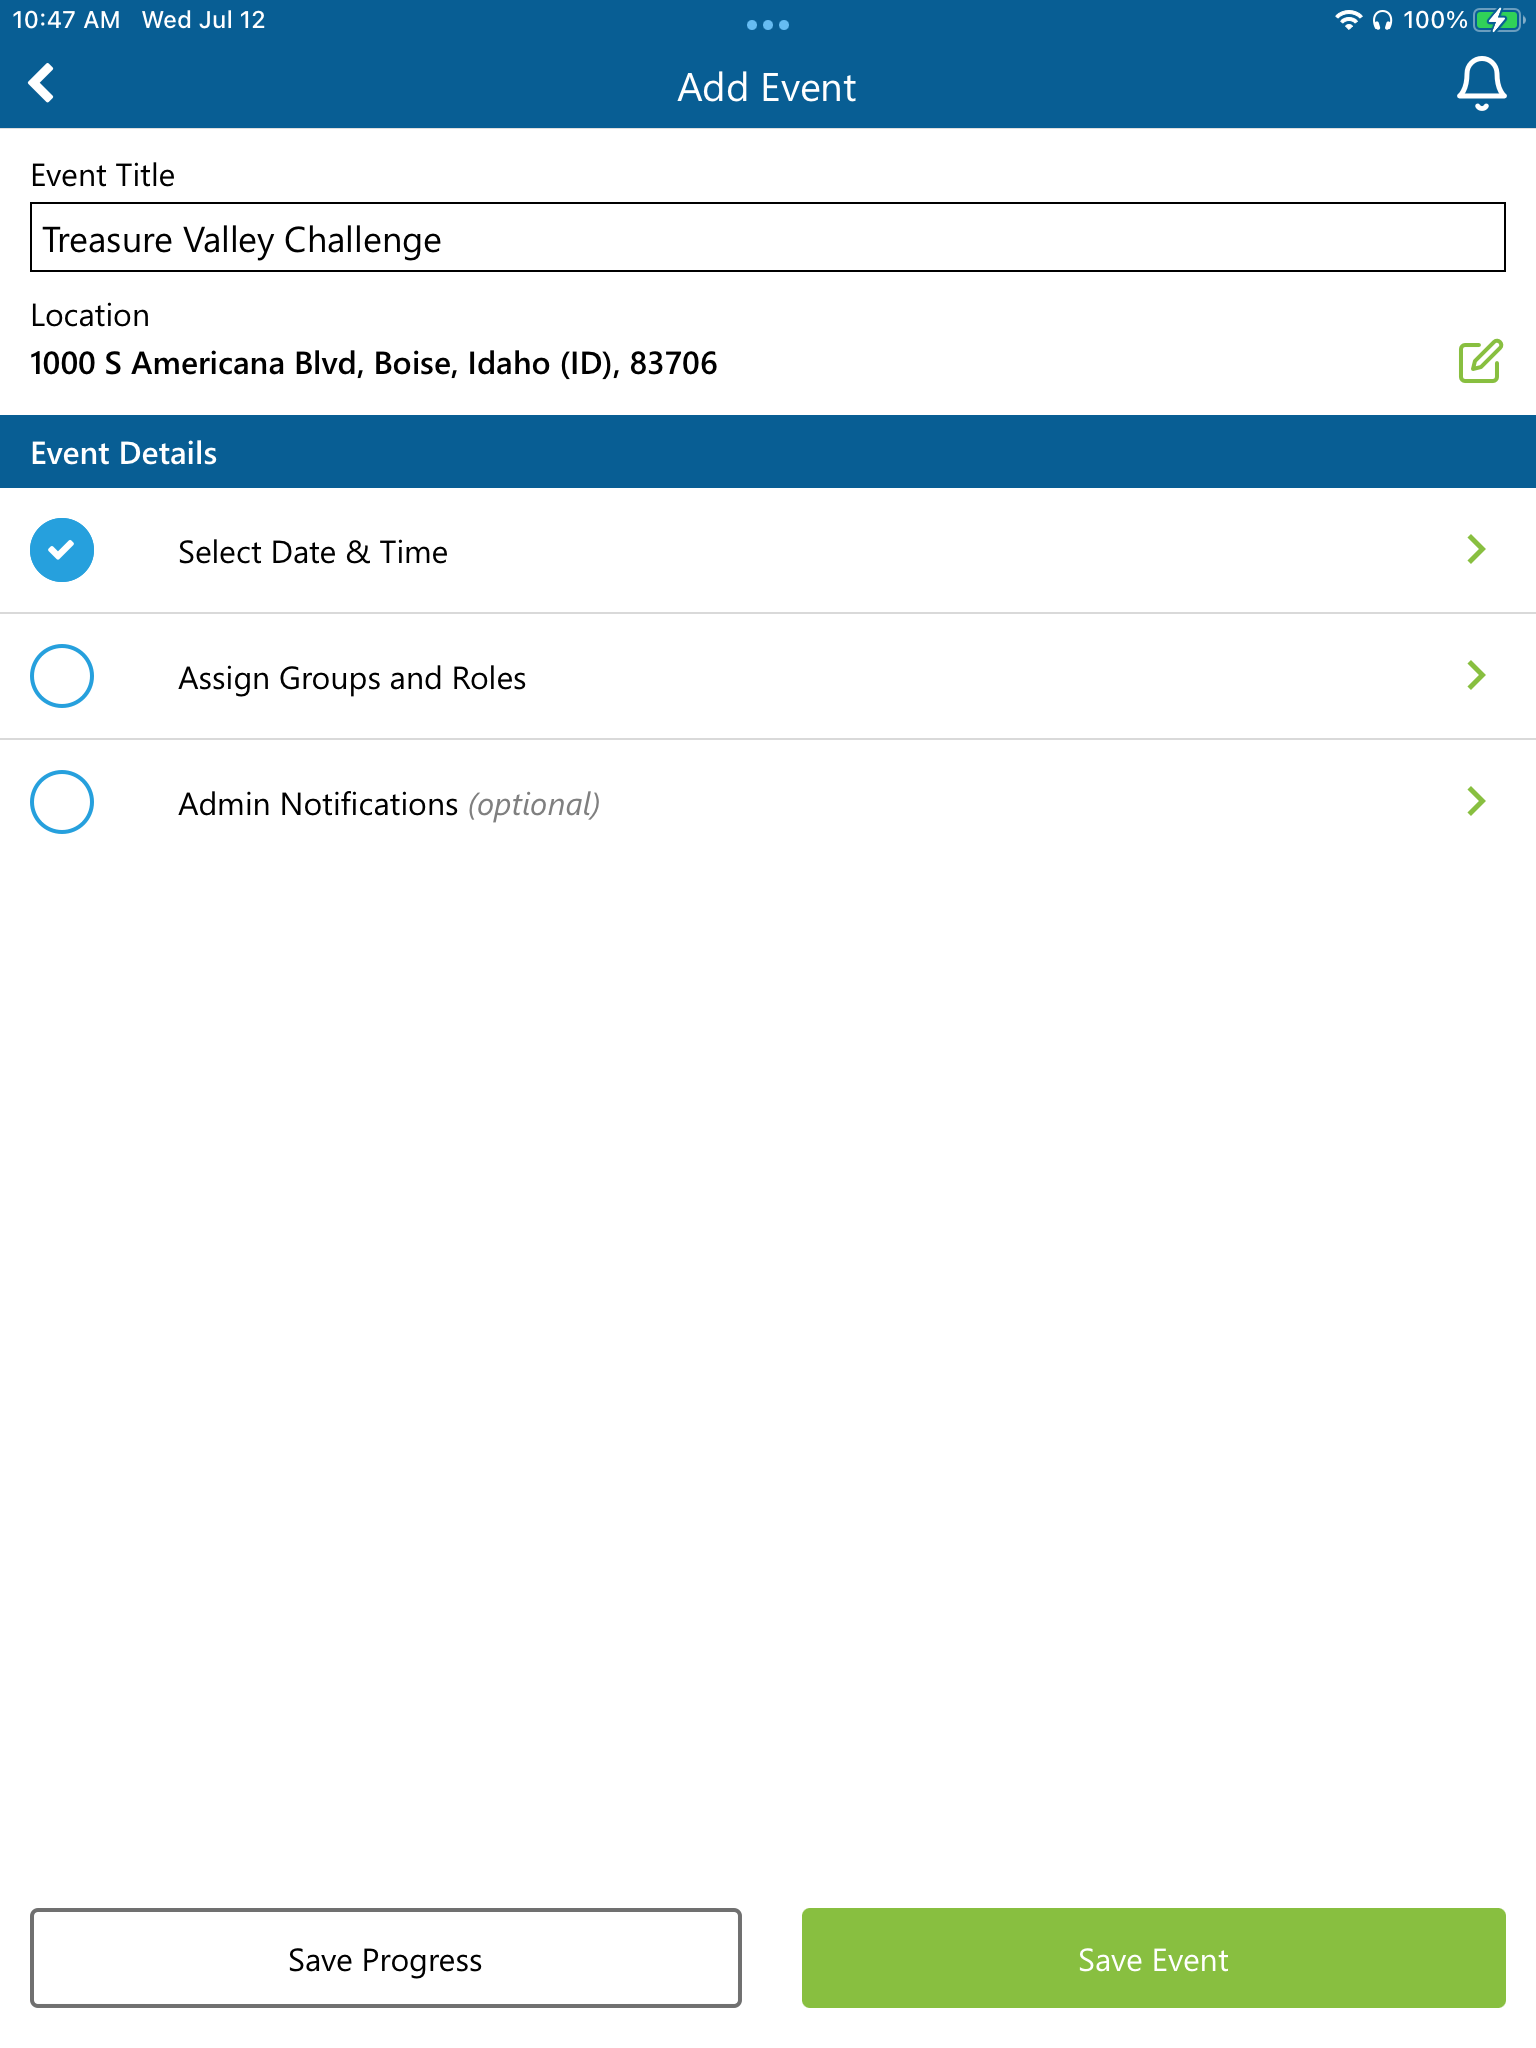
- From the List View tab, select + Add New Event
- Title your event (example – Family Camp)
- Edit the location if it’s different than your organization’s address
- Select the date and time of your event (single or multi day event)
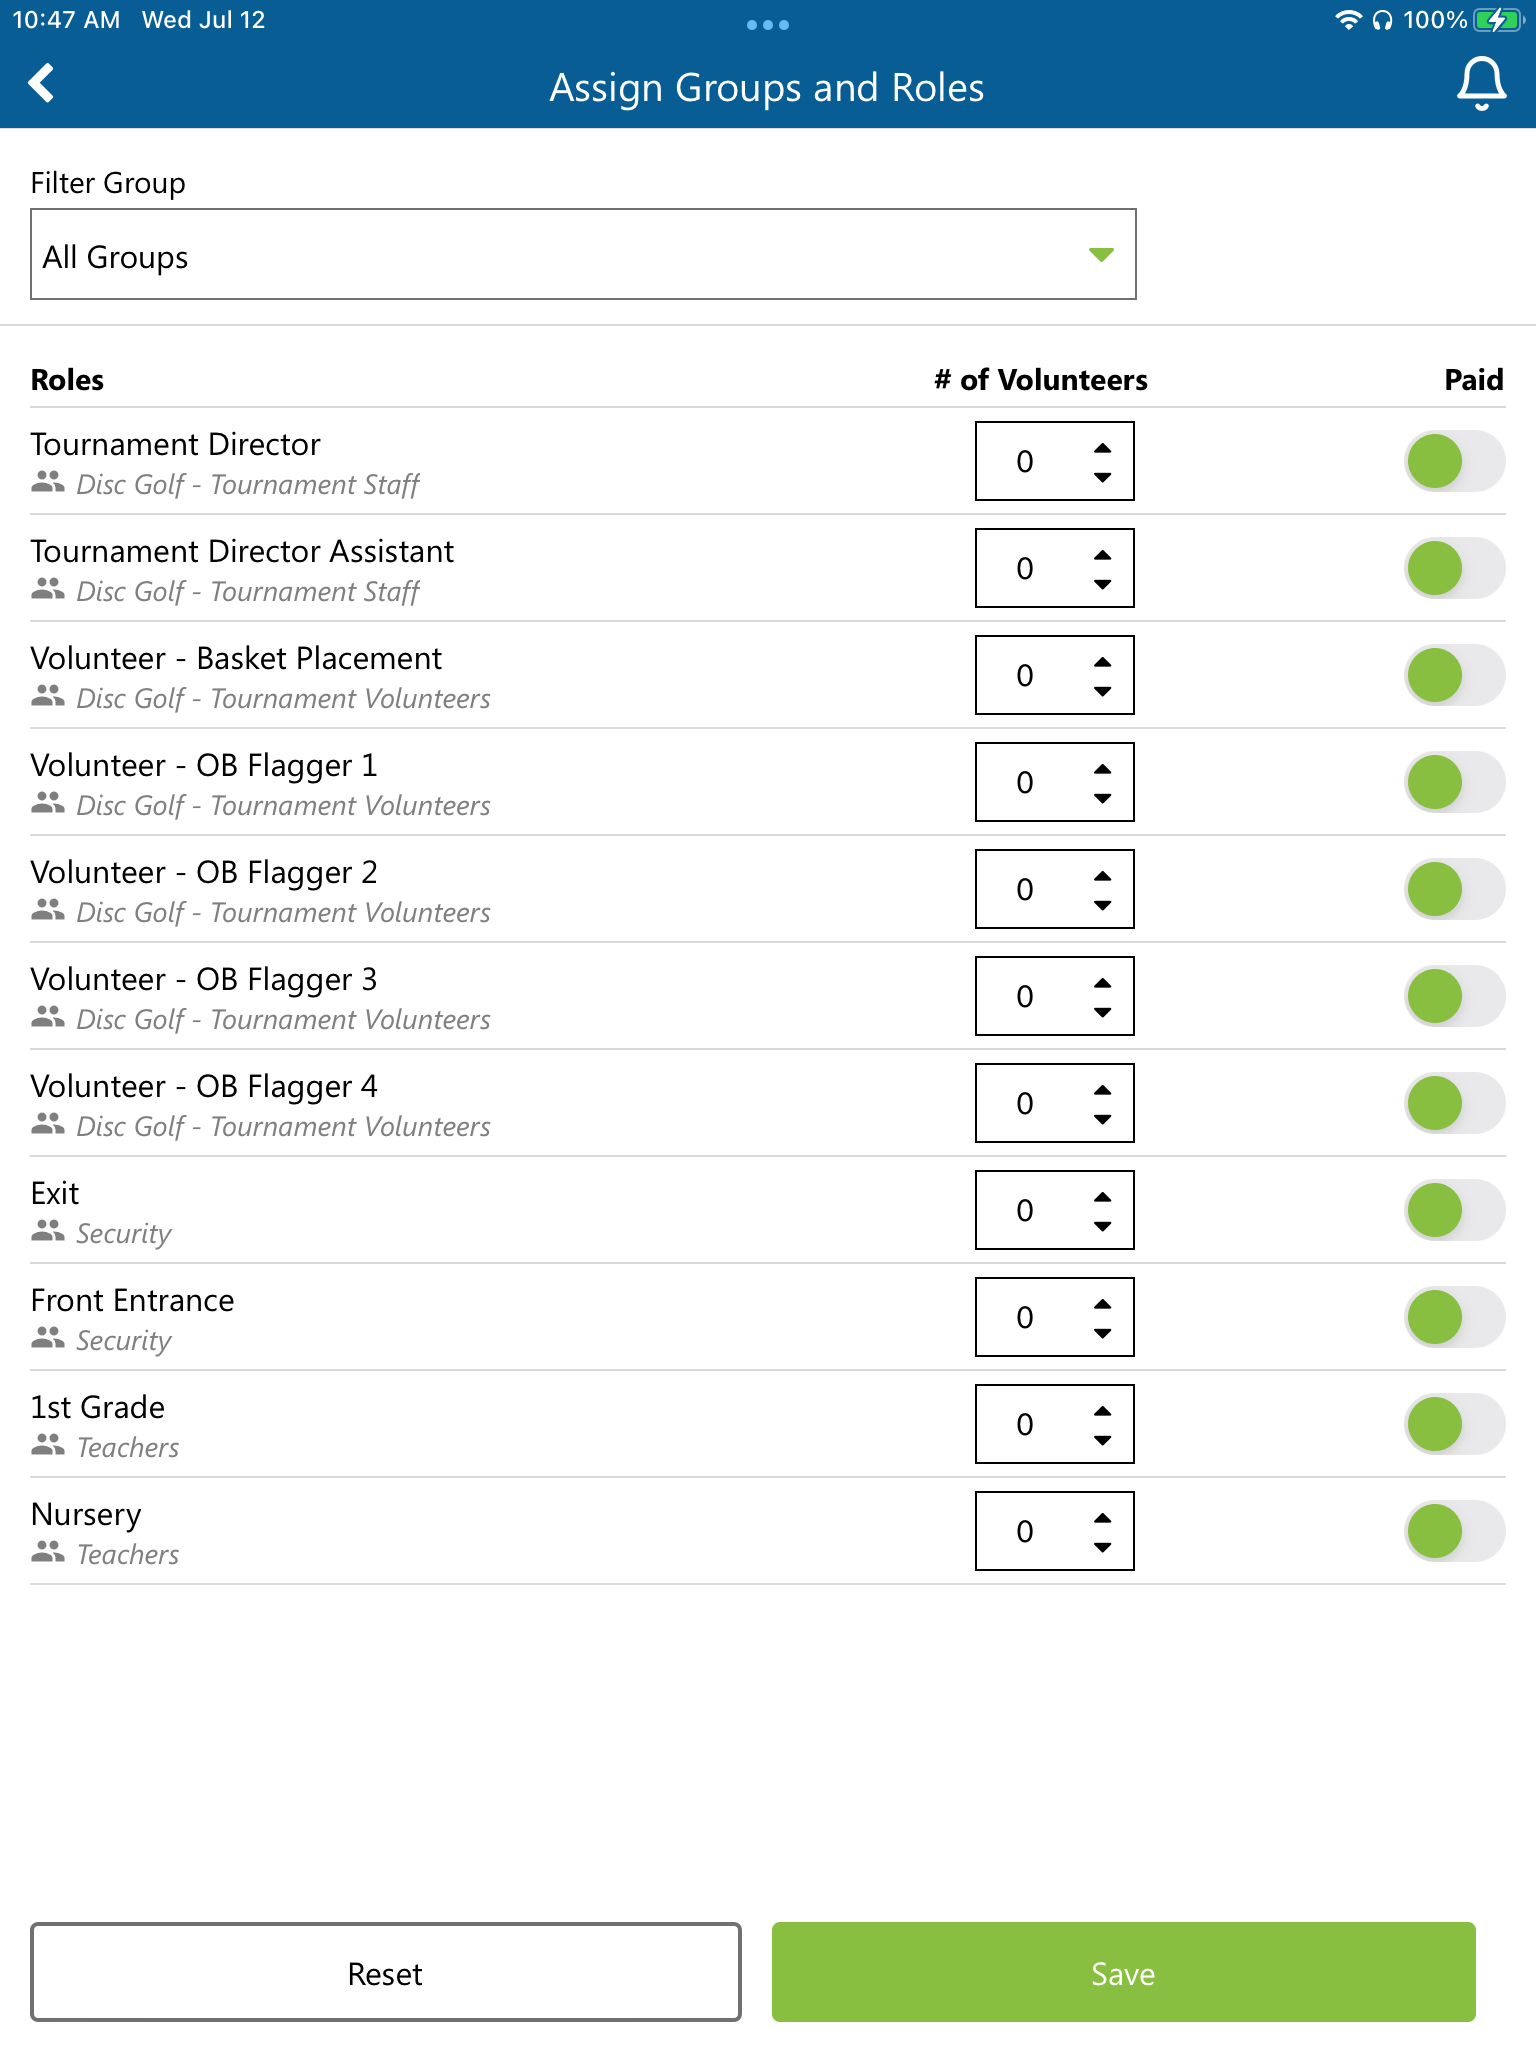
- Select how many of each Role are needed for your event
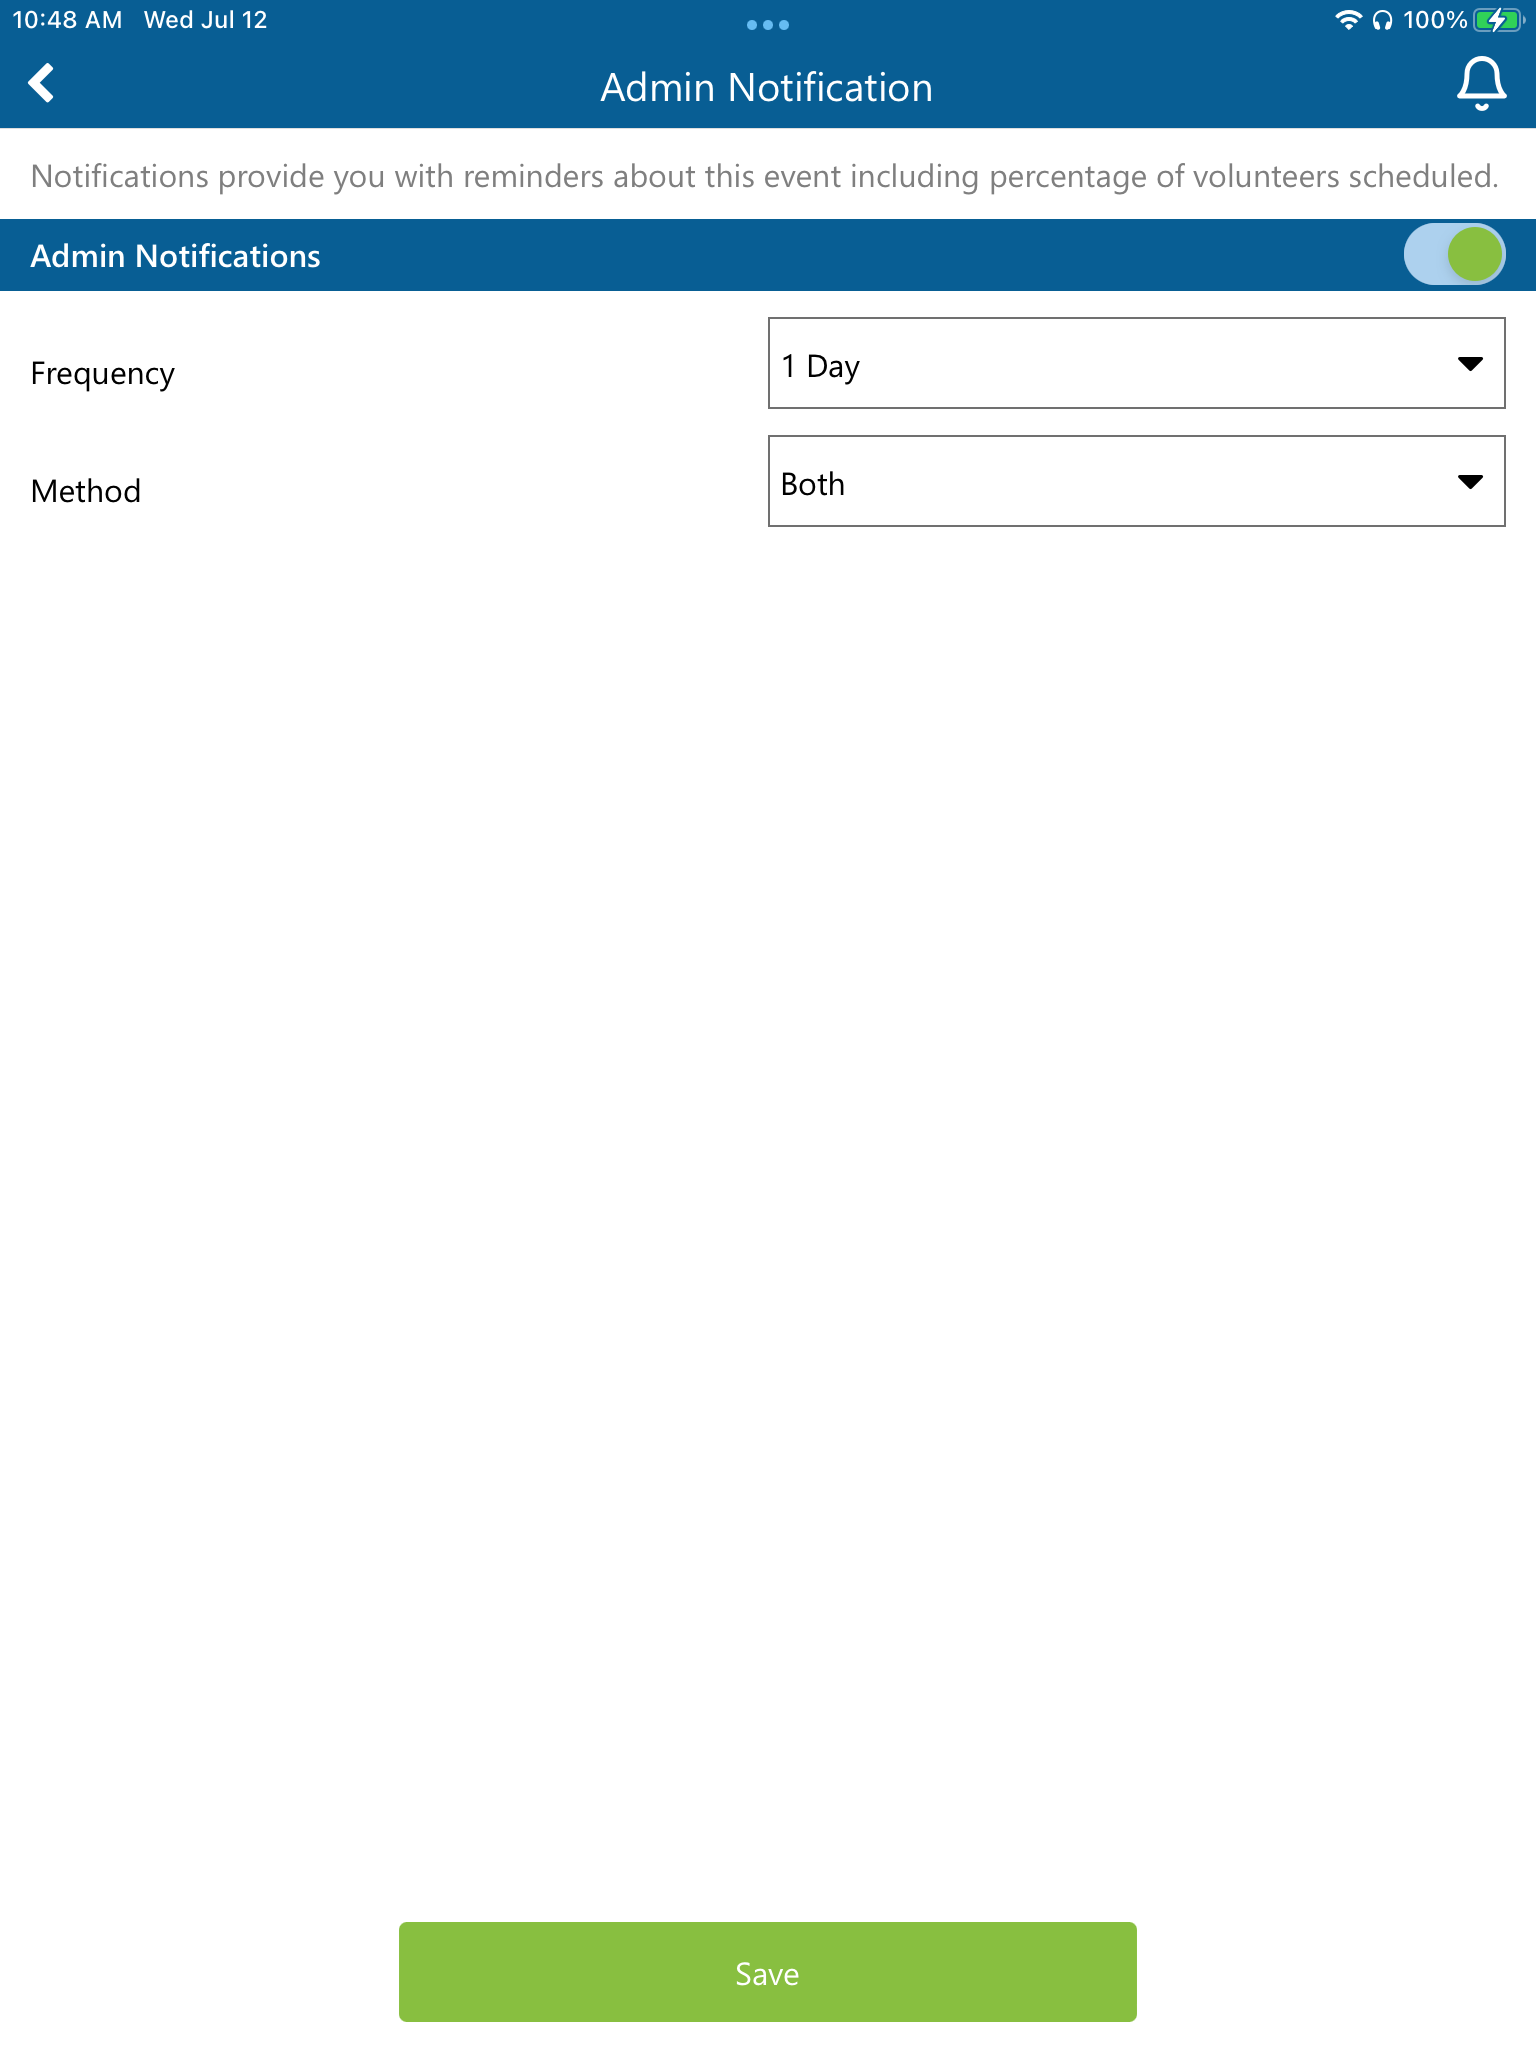
- Select Admin Notifications if you would like to receive reminders about the event.
- Choose Save to save you changes
Schedule Volunteers
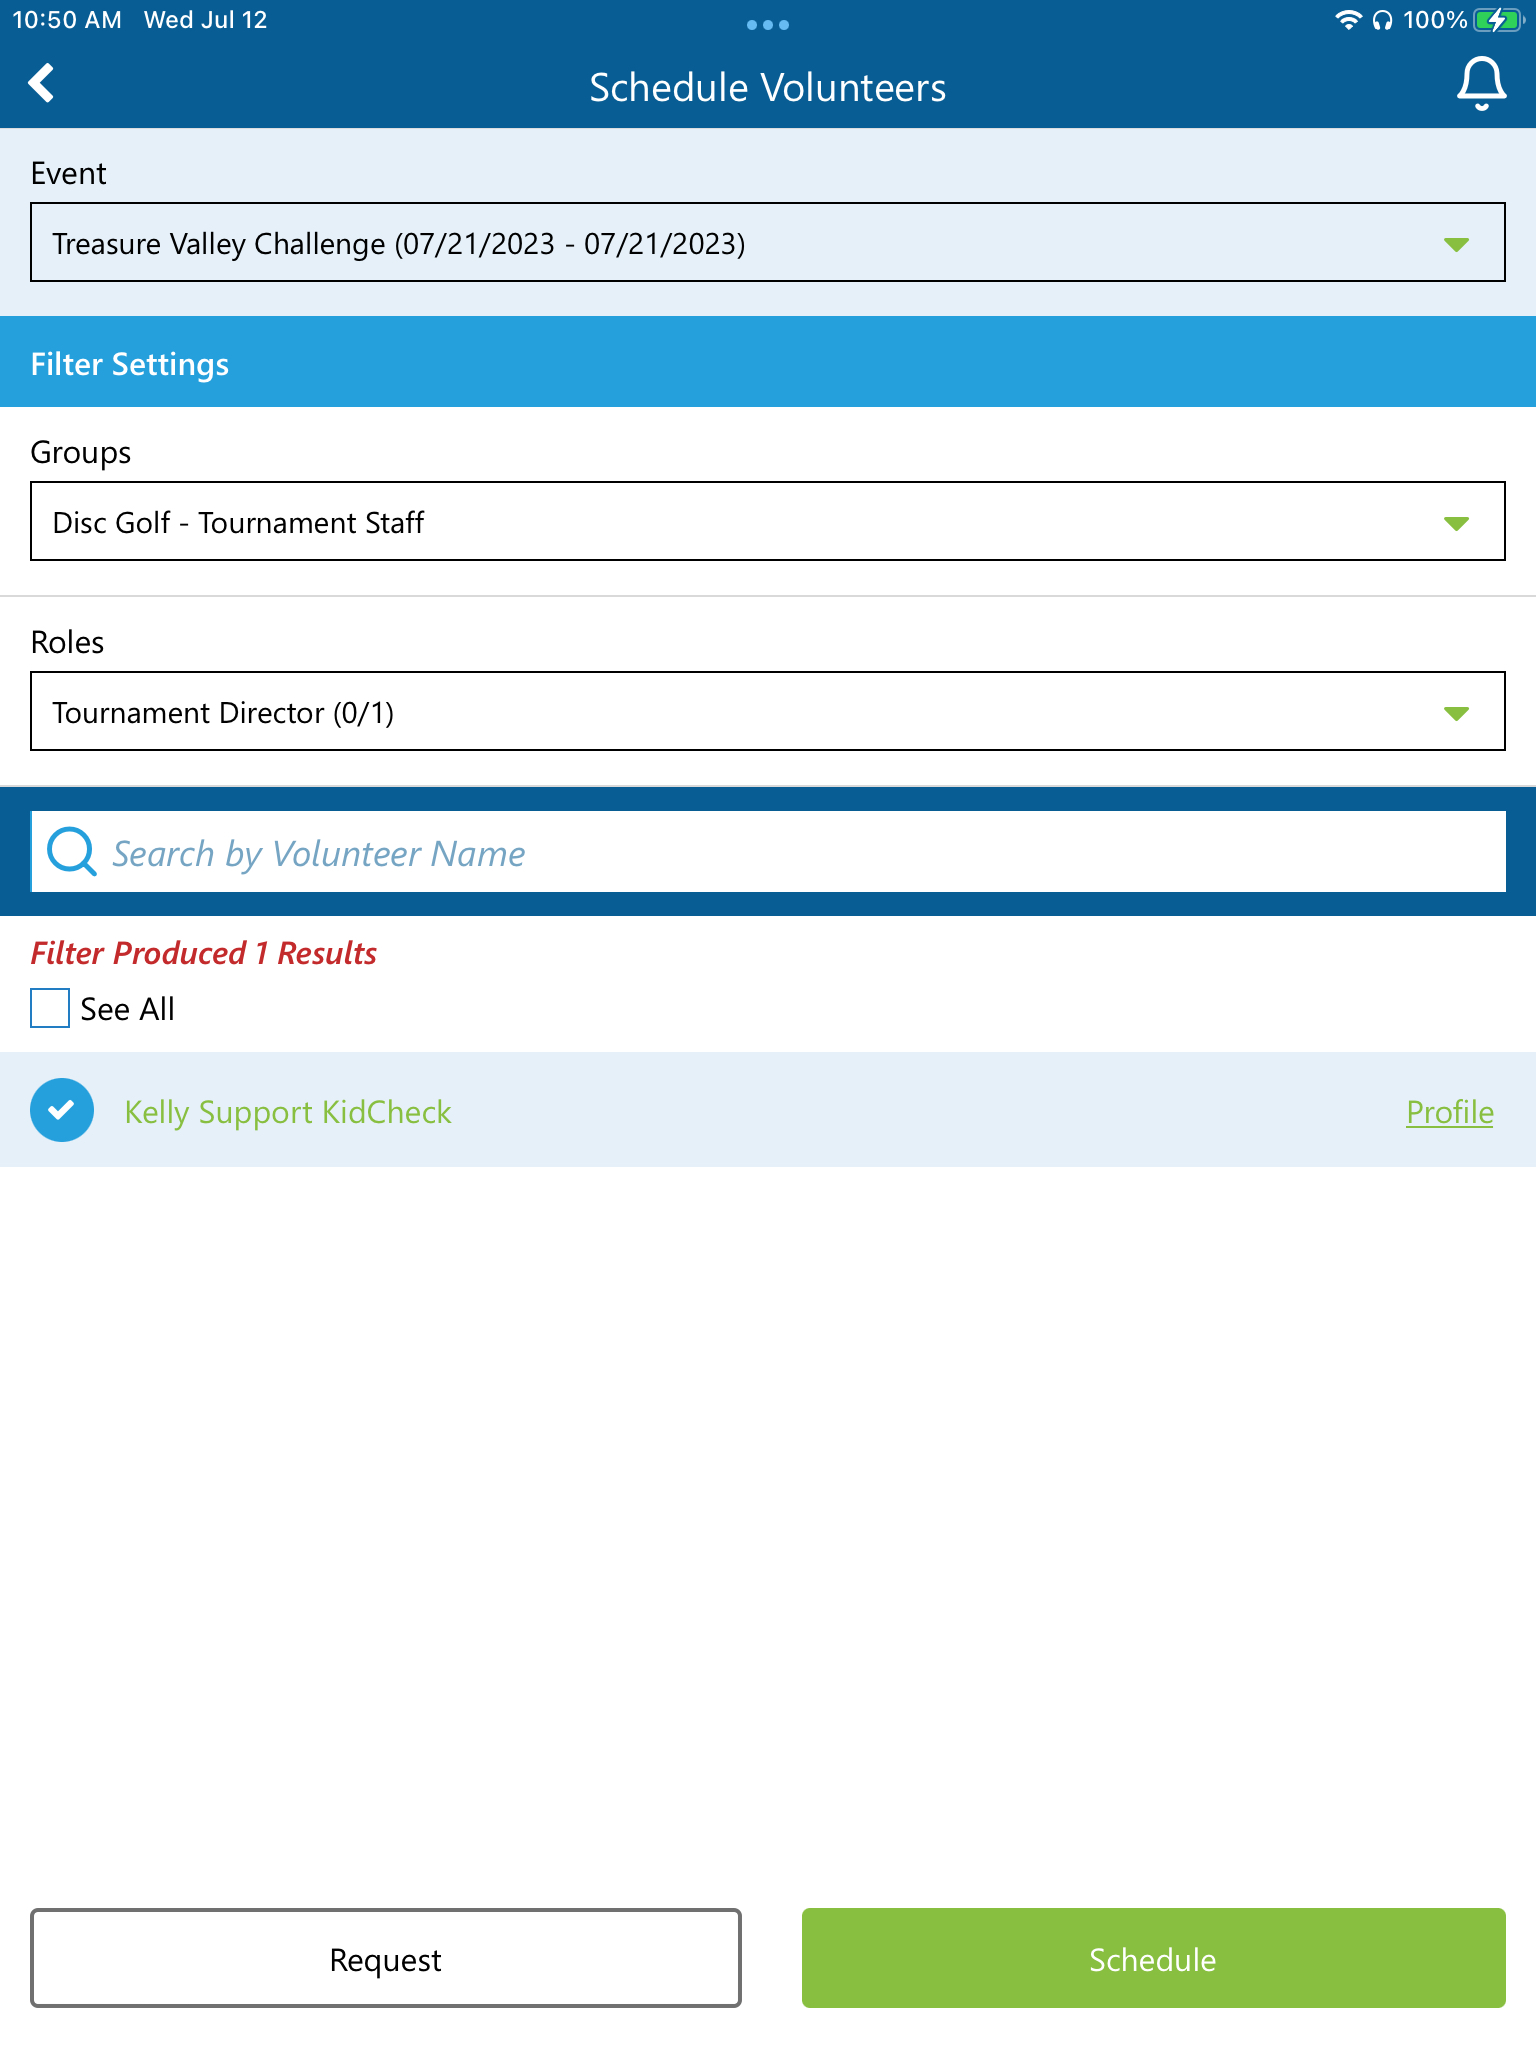
- From your event, click + Schedule Volunteers
- Select your Group and Role
- There are three options to search volunteers:
- Search by name
- Select See All to search all the volunteers
- Select from the list of volunteers that have already been assigned that role
- Select each volunteer by clicking their name or profile
- Clicking profile will take you to their profile to see if they have requested the day off, and to show role assignment/preference.
- Select either Request or Schedule
- Request will send them a text and give them the option to accept or deny inside their KidCheck Mobile App
- Schedule will send them a text letting them know they have been scheduled.
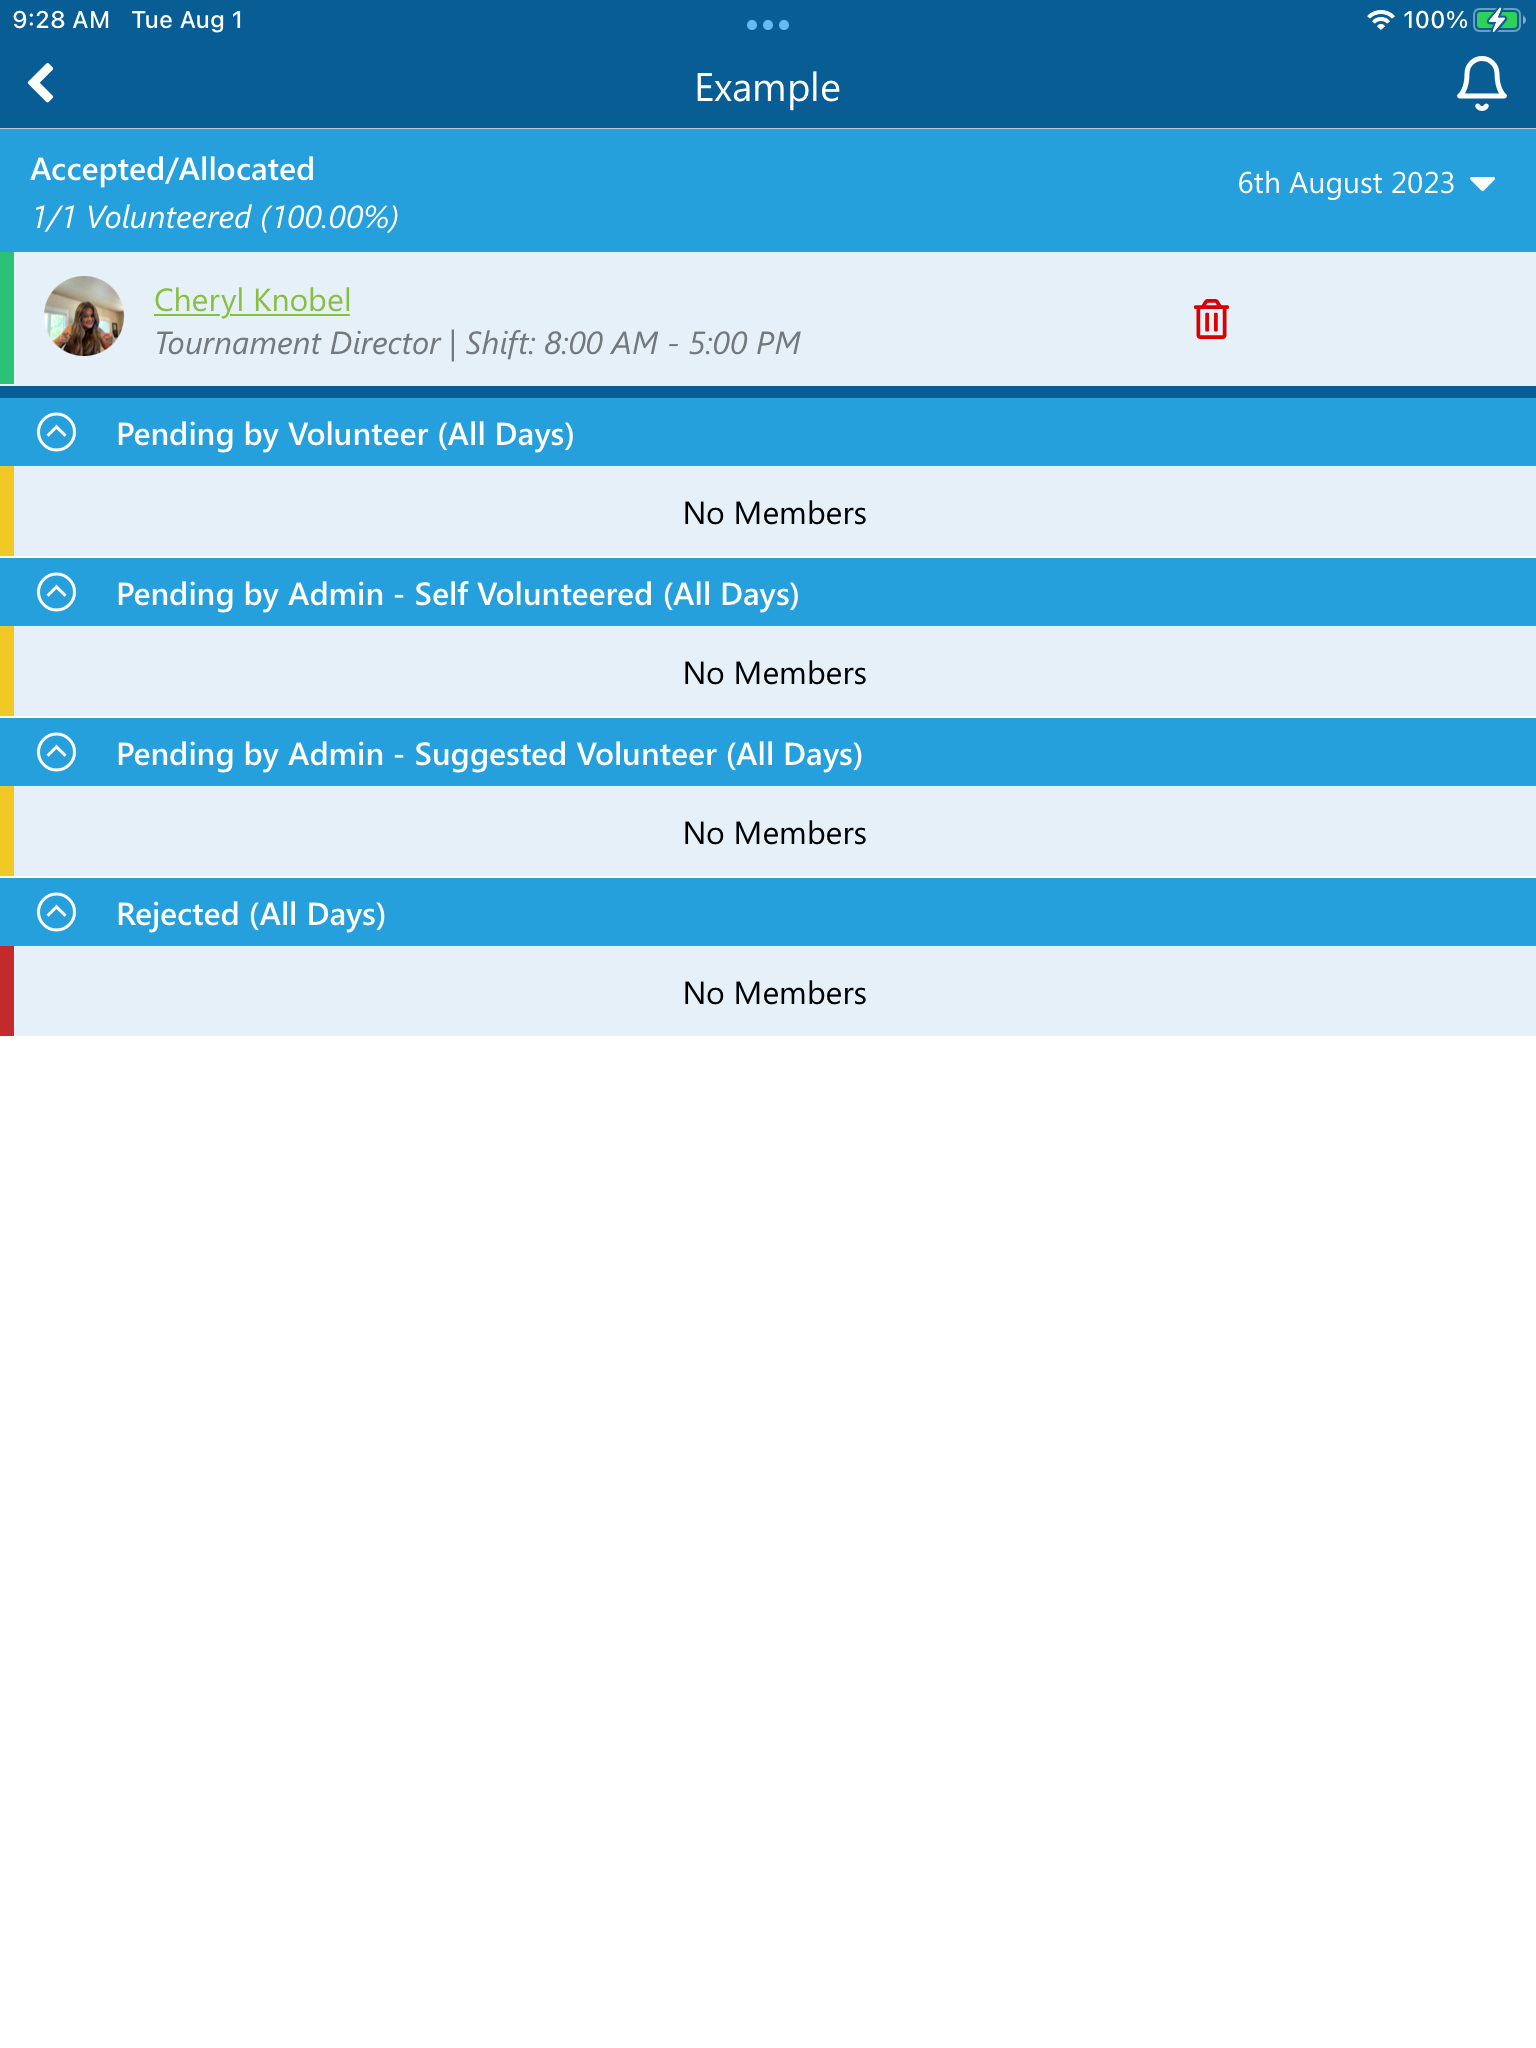
View Event Volunteers
- Once signed into the KidCheck Admin App, select Volunteer Scheduling
- Select the Event you have created for your Volunteers (choose the event from List or Calendar View)
- Choose View Event Volunteers hyperlink from your event and you will be able to view pending and scheduled roles in your event
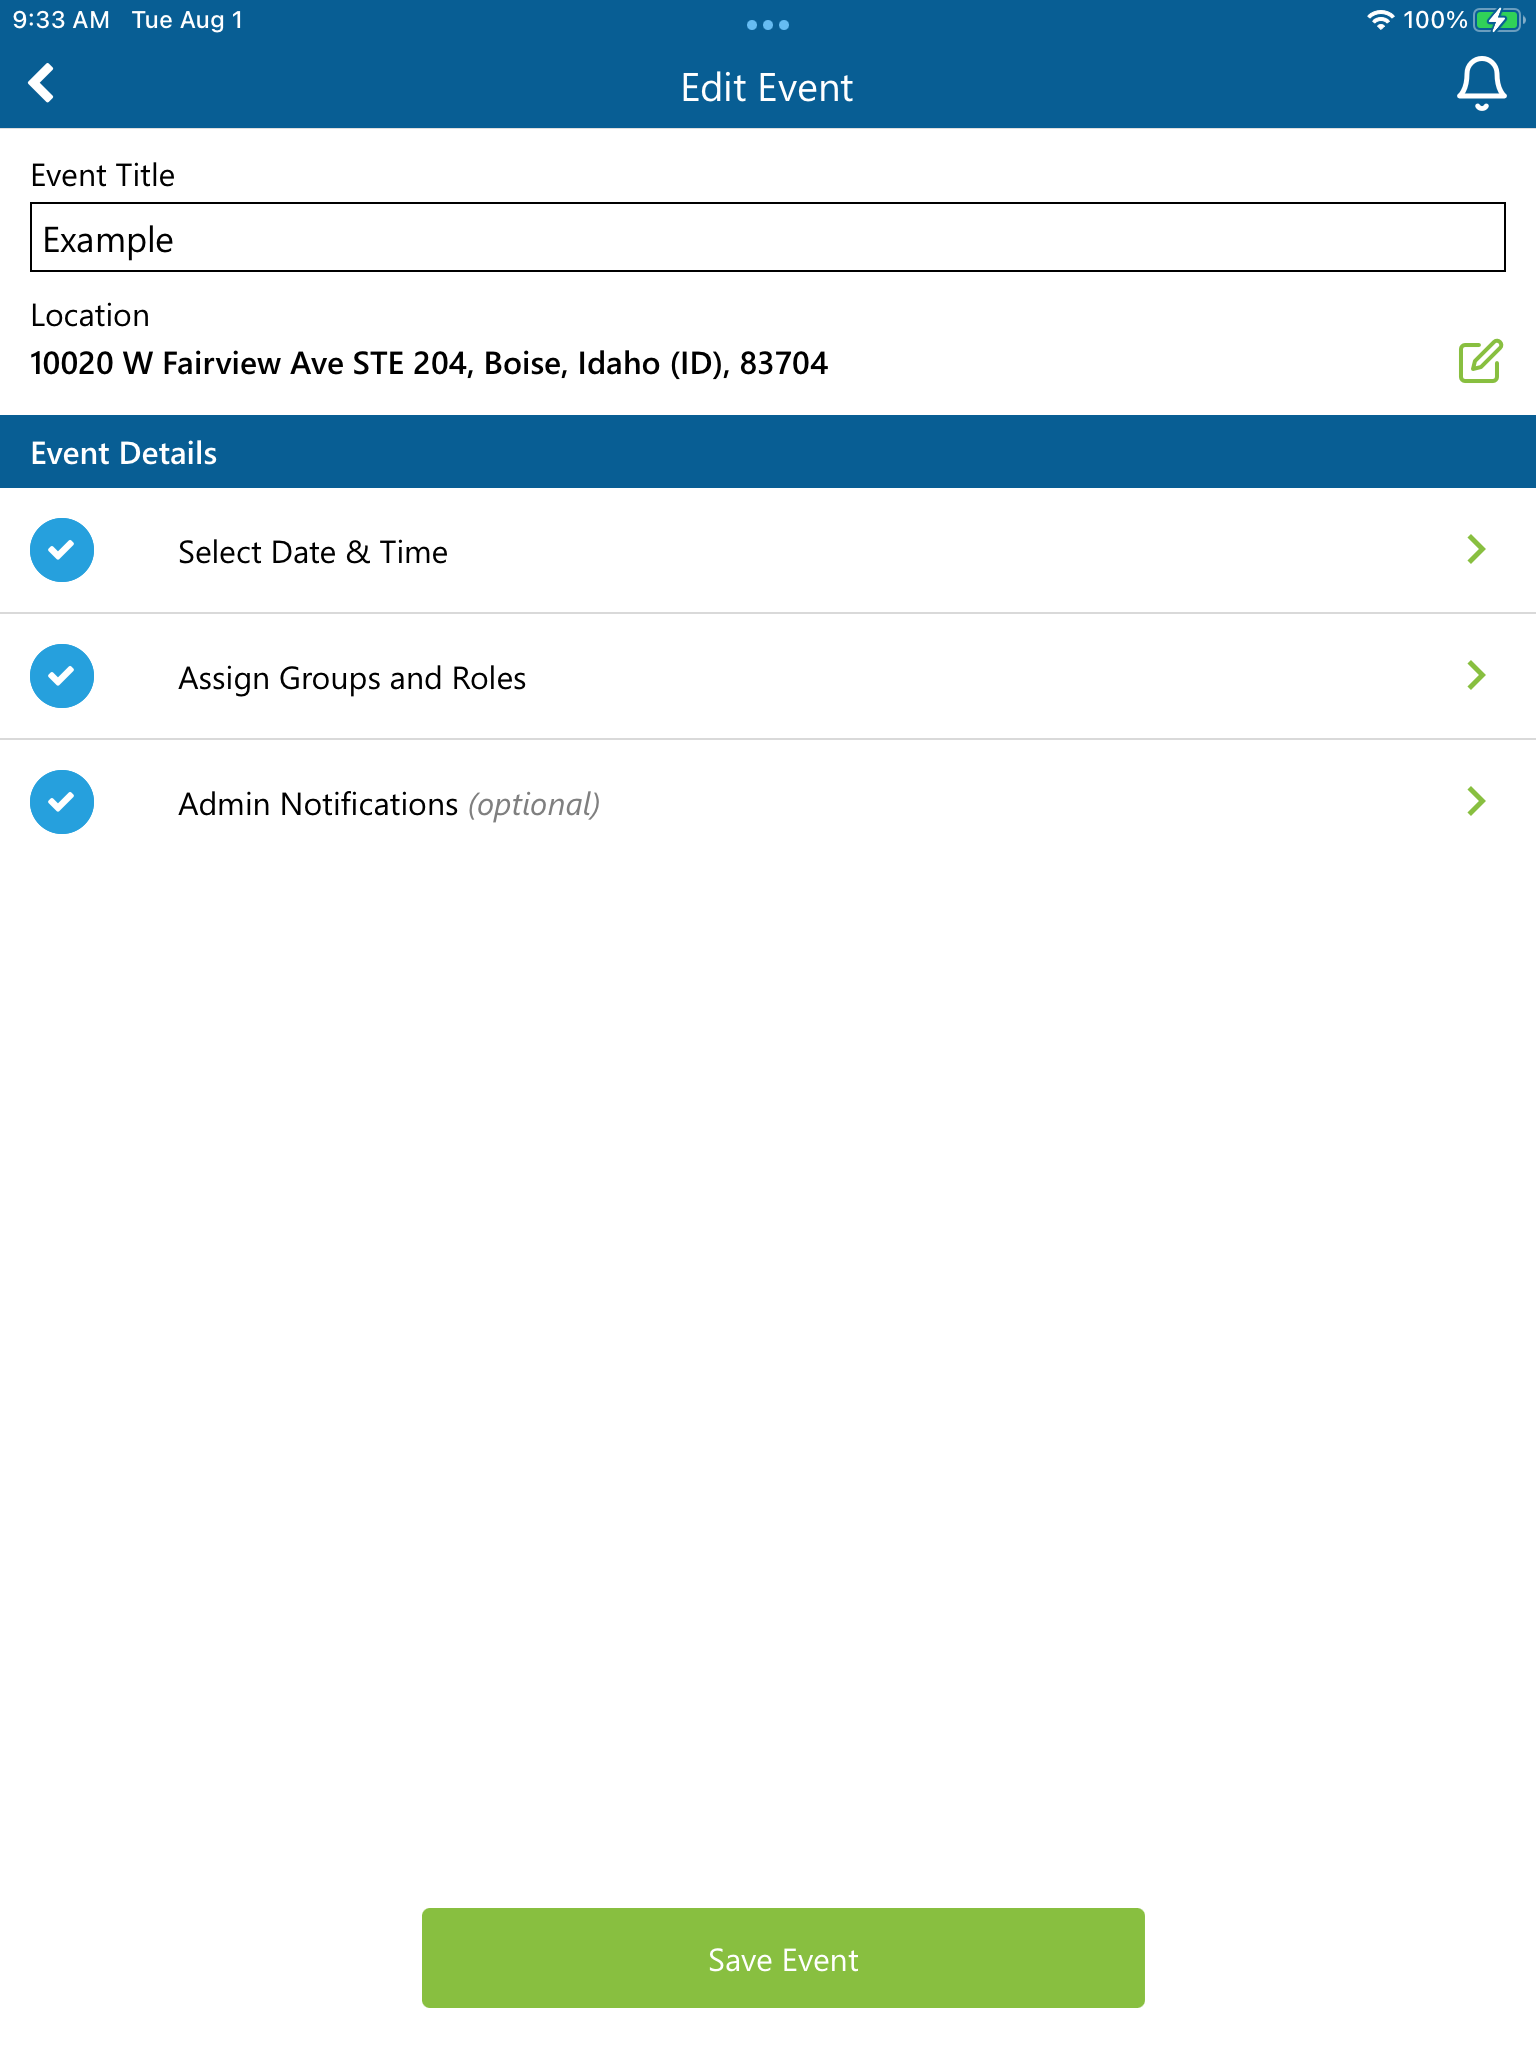
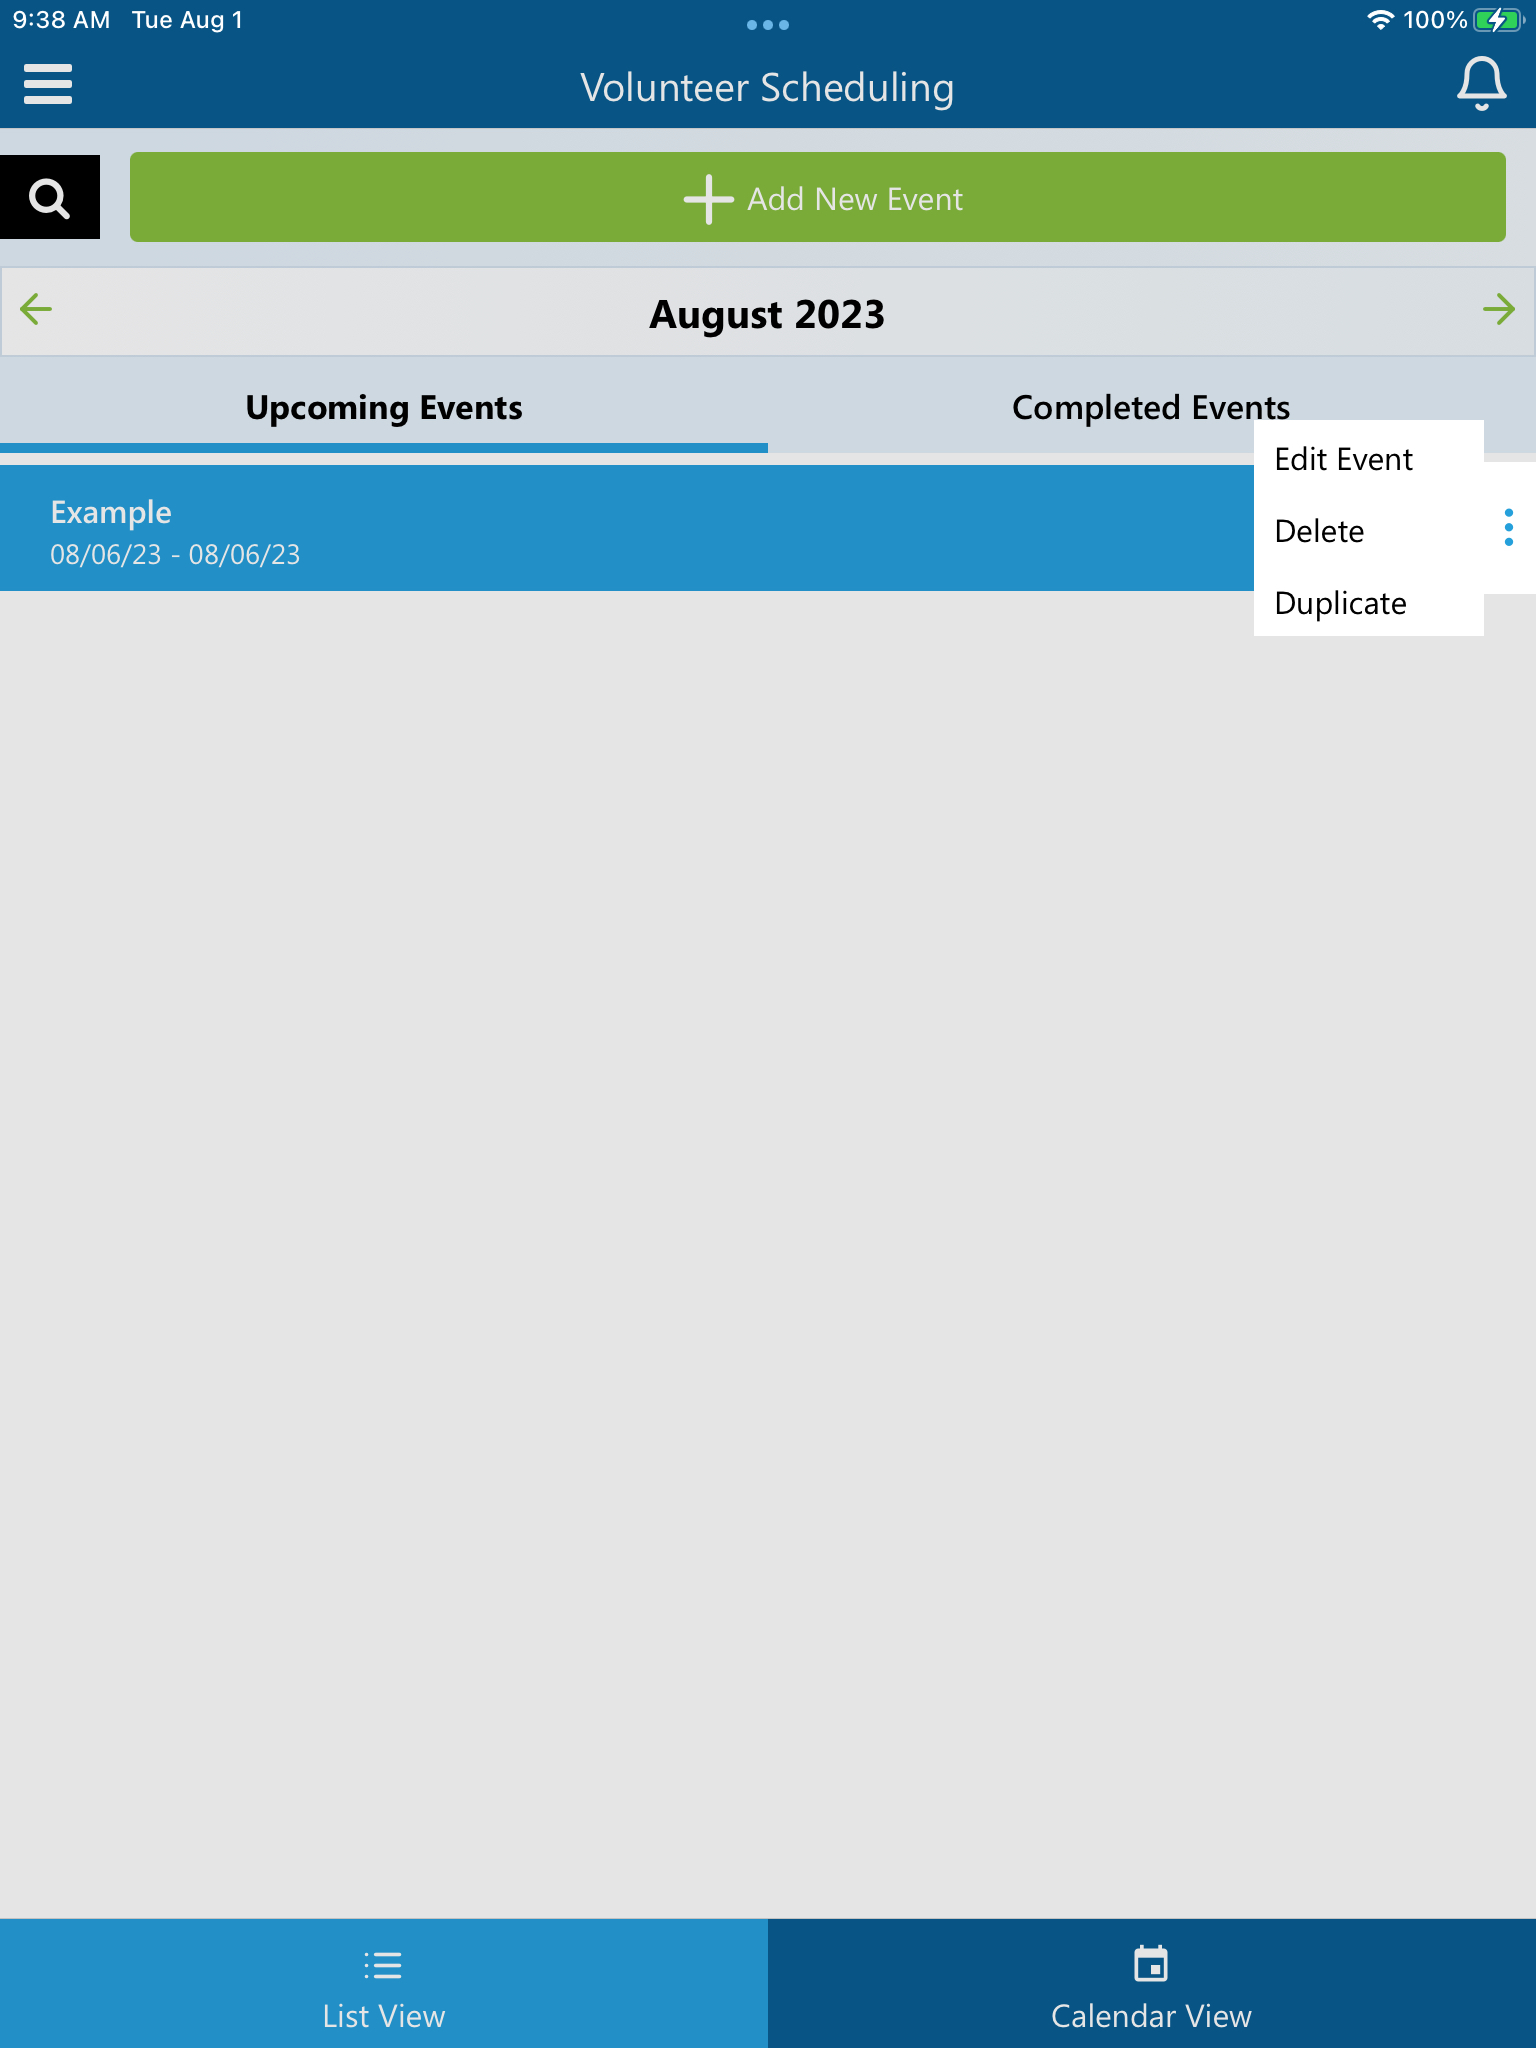
Edit an Event
- Once signed into the KidCheck Admin App, select Volunteer Scheduling
- Select the ellipses next to your listed event and choose Edit Event
- Edit settings will allow you to make changes on that event. You can make edits to the title, location, date & time, Groups and Roles, and the Admin Notifications
Duplicate an Event
- Once signed into the KidCheck Admin App, select Volunteer Scheduling
- Select the Ellipses next to your listed event and choose Duplicate
- You will then fill out the duplicate event details from the Event settings and choose Duplicate Event and Invite
Add Notes to a Volunteer's Profile
- Once signed into your KidCheck Admin App, select Volunteer Scheduling
- Locate the past event that your Volunteer worked on by selecting Completed Events>Your Event
- Select the Add Notes option next to the Volunteer you want to leave a note for
- Type in your note and choose Save (you can view these notes by logging into your organization account and going to People>Name of Volunteer>Volunteer Profile>Notes)
