Templates & Programs
What is a check-in template?
A template is used to set which check-in locations to make available during a certain activity or service. If you are a church, you’ll want to create a separate check-in template for each service and youth program you offer. If you are a school, activity center, fitness center or daycare, you may have just a single check-in template, or a different template for each of the youth programs you offer. Best practices and suggestions for setting up templates and locations to improve tracking and reporting can be found here.
What is a check-in program?
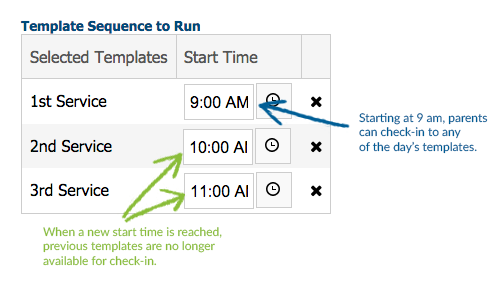
(Available on Plus Edition and above.) A check-in program allows you to set up a sequential order for your templates to automatically follow. For instance, if you are a church with two Sunday morning services, you would create a template for each service, and then create a “Sunday Morning Program” that would automatically switch between the two templates at the time you specify. This also allows parents to check their children into multiple services with just one visit to the check-in station.
1: Creating a Check-in Template
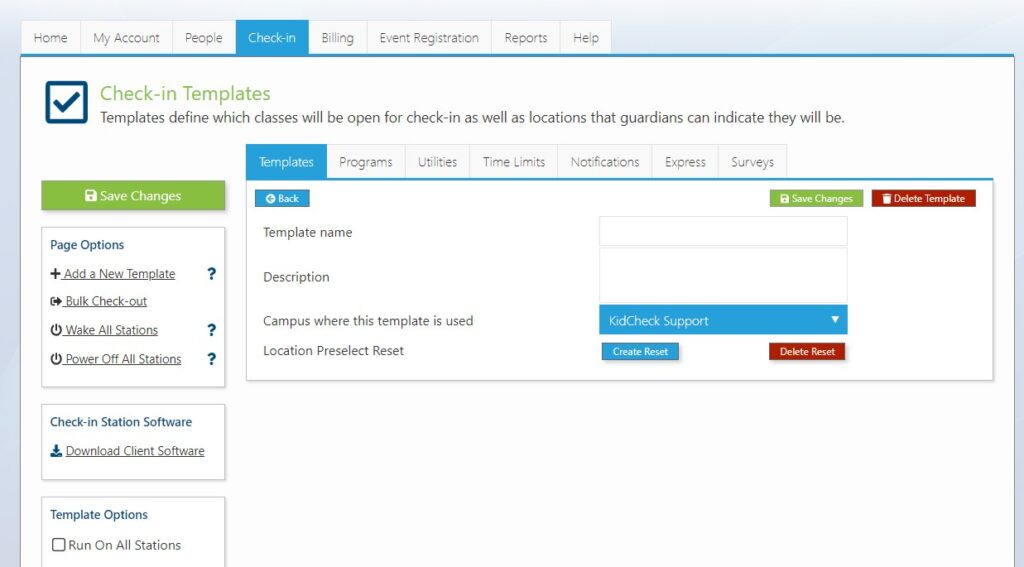
Under the Check-in tab, click on Add a New Template (on the left). Give your new template a name, description and choose the campus this template will be used for. Once you are done, click on Save Changes at the top right corner.
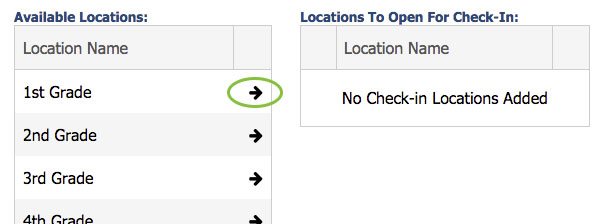
Next, we’ll assign which locations should be used for this template. To add a location to a template, click the arrow next to a location to move it into the Locations To Open For Check-in column. If you’ve set up your system to track guardian locations, you can also add those locations to the template via the “Guardian Check-in Locations” tab in this area. Once you are finished adding locations, click the Save Changes button at the top of the page.
For a video walk through on how to create templates, click this link – How to Create a Template
2: Creating a Check-in Program
Note: Programs are available on Plus and Premier editions.
Programs are a helpful tool when you need to use a sequence of templates on the same day. Refer to the “What is a check-in Program?” box above for an understanding of how programs are used in KidCheck.
Under your Check-in tab, click on the Programs tab. Then, on the left, select the Add a New Program link. Choose a name for your program (such as “Sunday Morning Services”, “Weekday Preschool & After School Activities”, etc), choose the campus where this program will be used, and then click Save Changes.
Next, you’ll select the templates you’d like your program to include. To add templates to your program, click the arrow next to the appropriate templates to add them to the “Template Sequence to Run” column. Then, assign each of the templates a start time (the time of day you’d like check-in for that template to begin). Keep in mind each template must have a different start time. Finally, add any “Check-in Closed” times (if necessary). Click Save Changes when you are done creating your check-in program.
For a video walk through on how to create programs, click on this link – How to Create a Program