Billing: Add-Ons & Discounts
Add-Ons & Discounts allow you to charge for specific products while people check-in/out. You can sell anything from clothing to a class fee to charging hourly for facility use. Also see Check-In Passes for additional childcare billing options.
Note: At the moment, Add-Ons & Discounts are available on computer-stations only (not mobile/tablet stations) and only available on the Premier edition.
Start by enabling a merchant account. Then set up Add-Ons & Discounts and sell them during check-in/out.
-
Setting Up Your Merchant Account
-
Create Add-Ons & Discounts
-
Check-In: Using Add-Ons & Discounts
-
Viewing Purchased Add-Ons
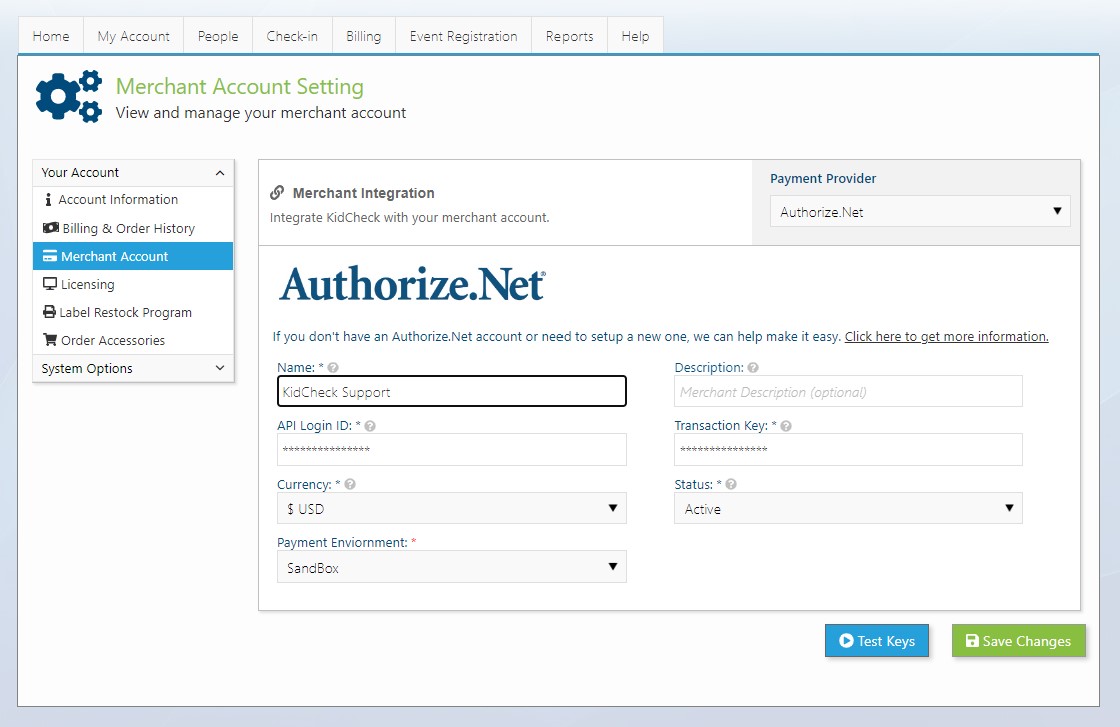
Setting Up Your Merchant Account
- To start setting up your Authorize.Net account, navigate to System Settings > Merchant Account (on the left).
- Select the ‘Click here to get more information’ link in the section description and fill out the form. KidCheck will then contact you to continue the process/paperwork of setting up your merchant account.
- Once your merchant account is created (the paperwork process takes about a week), navigate to System Settings > Merchant Account (on the left).
- Enter the requested information from your merchant account and save the changes.
Alternatively, if you already have an Authorize.Net account, you can simply add the appropriate keys and connect your account in KidCheck.
Create Add-Ons & Discounts
- Enable Add-Ons and Discounts via Settings>System Options>Billing Options or the Add-Ons & Discounts tab (the Billing Options tab allows you to choose whether to display Add-Ons during check-in, check-out, or both).
- Click on the Billing tab>Add-Ons & Discounts tab, and then select the green +Create New button.
- Complete the form to create the desired Add-On/Discount – this can be anything from a service to a physical item or whatever you happen to sell.
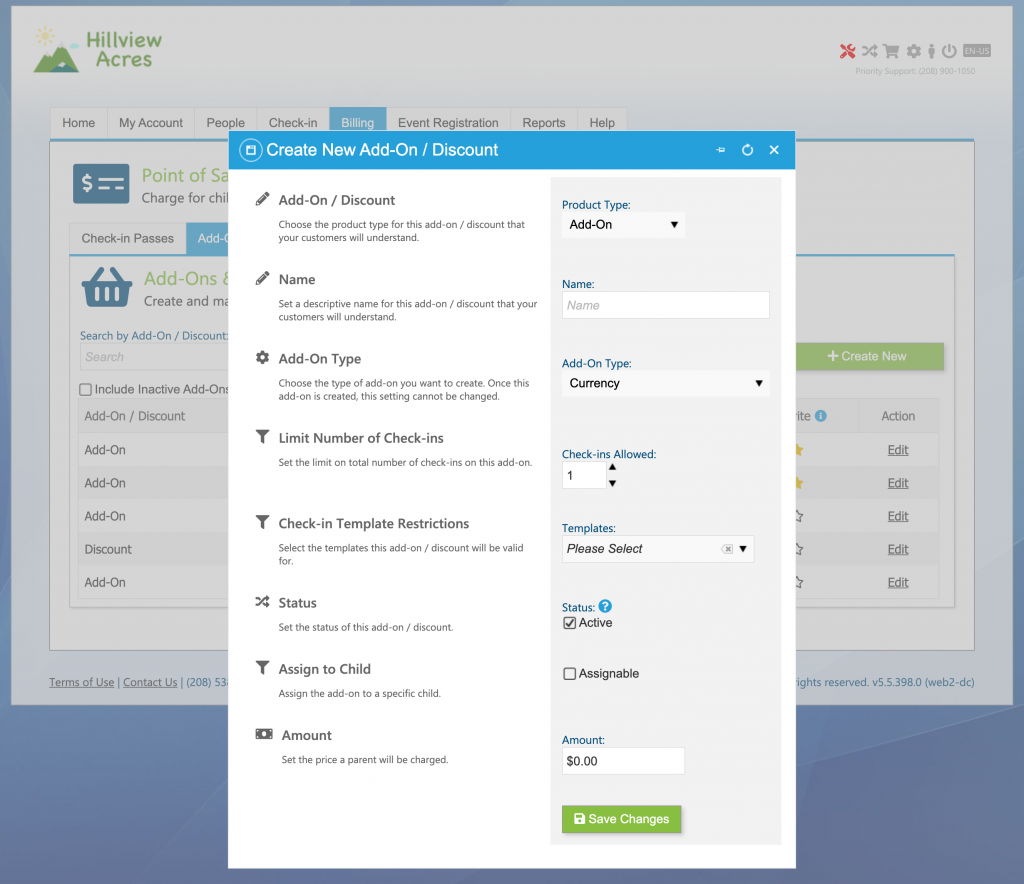
Create Add-Ons with a variety of options to meet your need. Charge by a specific amount or even by hour.
Note that Add-Ons can be charged by a specific amount (e.g $5) or at an hourly rate (e.g. $5/hr). Discounts can be a specific amount (e.g. $2), per hour (e.g. $2/hr), or a percentage (e.g. 15%).
Check-In: Using Add-Ons & Discounts
Depending on your settings, add-ons will display during check-in, check-out or both. (Adjust this in Settings >System Options > Billing Options).
- If add-ons apply to a template selected for check-in/out, the user will be taken to a Purchases page.
- On that page, select the desired add-on.
- If an add-on is assignable, select the person it applies to. (Add-ons not specifically assignable can optionally be assigned to a specific person as well.)
- Add any desired discount – once in the cart, discounts can be dragged to apply to a certain product/line-item or can apply to the entire cart.
- Users can also create any desired one-time add-on/discount on the fly.
- Once items are in cart as desired, select the Purchase & Complete Checkin/Checkout button to complete the purchase.
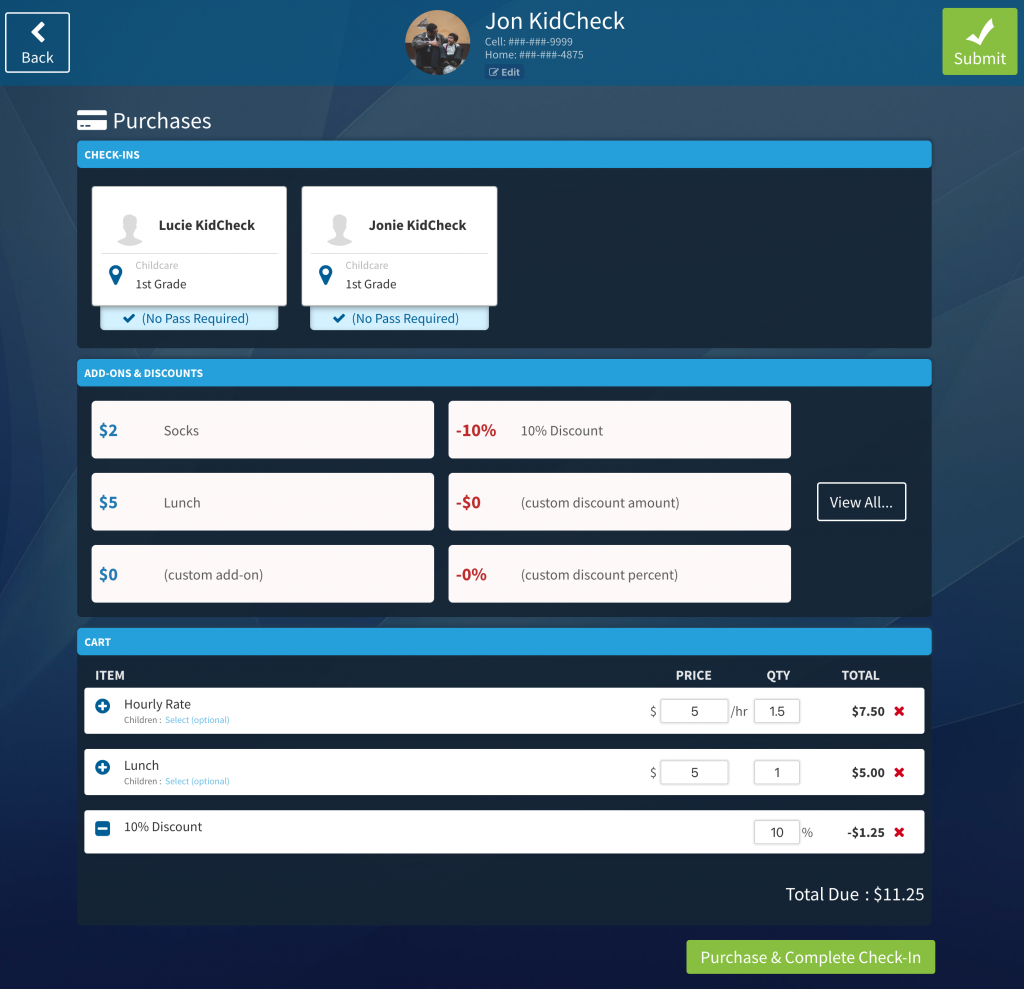
Charge for Add-Ons during Check-In/Out as you desire. You can even create custom Add-Ons or Discounts in the moment as needed.
View Purchased Add-Ons
Once purchased, view Add-Ons associated with a specific child in the Admin Console. You can also view complete transaction history via the Billing > Transactions tab.
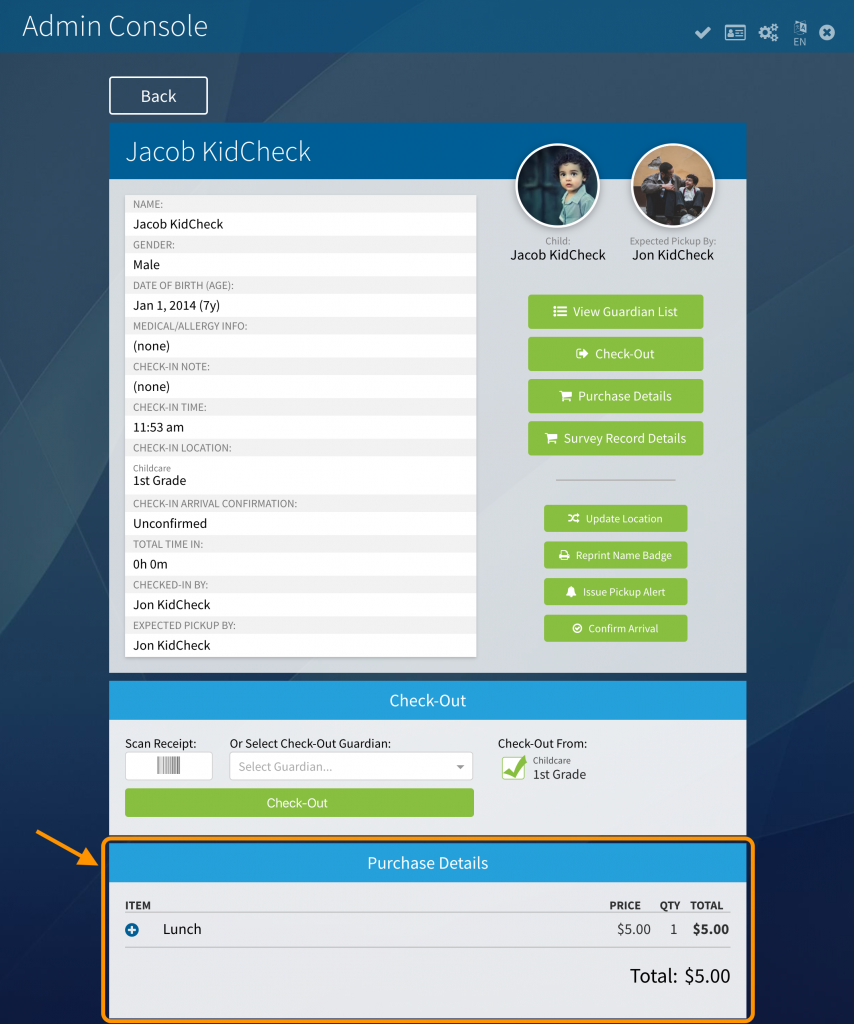
View Add-Ons associated with a child in the Admin Console.
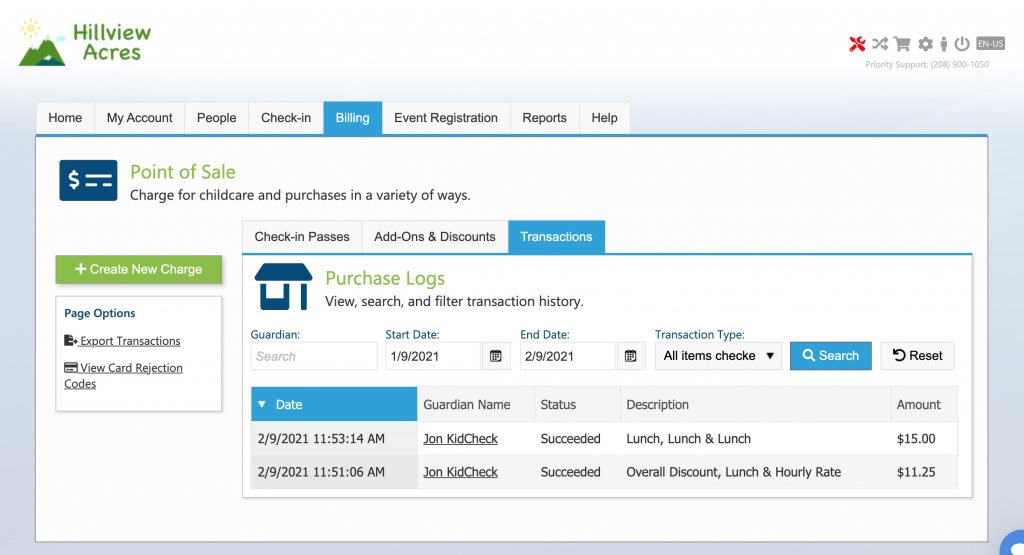
View all purchases on the Transactions tab. Select a specific purchase to see details or refund it. Export all transactions using links on the left.