License Your Check-in Stations
Note: A computer must be licensed in order to run check-in. A license is not needed on administrative computers that aren’t used for processing check-ins. Before a check-in computer can be licensed, the KidCheck Client needs to have been installed. Installation directions can be found back in Step 1: Install the KidCheck Client.
On each of your check-in stations, log in to your KidCheck account, click on the Settings Gear icon in the upper right, and then on the Licensing item in the left sidebar. Finally, click on the Edit This Computer’s License link.
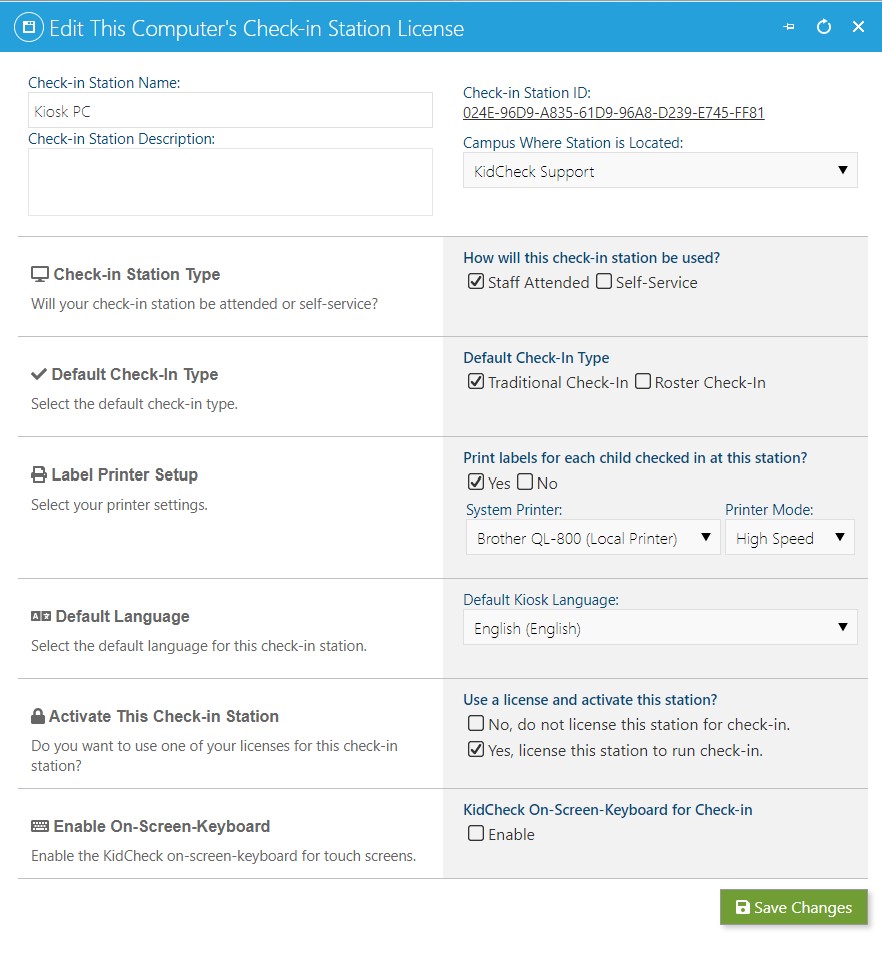
Enter the appropriate settings for your check-in station:
- Name: a name to designate the computer being licensed.
- Description: (optional) additional details of the computer being licensed.
- Campus Where Station is Located: Select your campus from the menu.
- Check-in Station Type: Staff attended or self-service. If you plan on having a volunteer/staff member in the vacinity of the station, choose staff attended.
- Label Printer Setup: Select your label printer (if applicable).
- Default Language: Select the language you’d like to use.
- Activate This Station: Select “Yes, license this station to run check-in”.
- Enable On-Screen-Keyboard: (if applicable) Select this if you have a touchscreen and want to use the on-screen keyboard.
- Click the green Save Changes button.